Exposure Value Demystified for Beginners and Pros
1. Introduction
1.1 Understanding the Importance of Exposure Value
Exposure Value is one of the most essential concepts in photography, bridging the gap between technical precision and artistic creativity. At its core, it is a system that helps photographers control the light in a scene by adjusting settings like aperture, shutter speed, and ISO. For beginners, understanding Exposure Value provides the foundation to move beyond auto mode and take charge of their camera. For professionals, mastering EV enables them to push the boundaries of their creative vision.
Photography is all about capturing light, and Exposure Value acts as the universal language that translates light into an adjustable scale. Whether you’re shooting in a dimly lit room or under the harsh midday sun, EV adjustments allow you to adapt seamlessly. Learning to manipulate EV empowers photographers to balance the exposure of their images, ensuring that highlights and shadows work harmoniously to create the desired impact.
1.2 Who Should Learn Exposure Value?
Exposure Value is not limited to professionals; it is a skill that benefits anyone looking to improve their photography. Beginners can use it to gain confidence in manual settings, making their images stand out. For seasoned photographers, EV provides an advanced tool for tackling challenging lighting conditions and achieving greater control over their shots.
By understanding Exposure Value, photographers of all skill levels can elevate their work, capturing images that are both technically sound and artistically compelling.
Affiliate Disclaimer
This blog post may include links to affiliate sites. If you click on an affiliate link and make a purchase, we may earn a small commission or receive other compensation at no extra cost to you. Please note that many of the links on our site are affiliate links. Our use of these links does not impact the products, services, or websites we recommend to you. This disclaimer covers all forms of communication with you, including our website, email, phone, social media, products, and other platforms.
2. What is Exposure Value?
2.1 Definition of Exposure Value
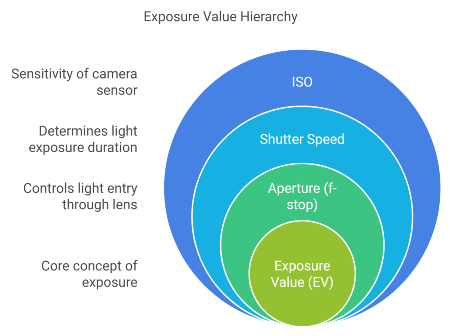
Exposure Value is a standardized way to measure and describe the amount of light captured in a photograph. It simplifies the interaction between three critical camera settings: aperture, shutter speed, and ISO. These settings work together to determine how light is recorded in an image, and Exposure Value serves as a single number that represents their combined effect. For example, an EV of 0 indicates a balanced exposure under specific conditions, while positive and negative EV values represent overexposure and underexposure, respectively.
Understanding Exposure Value is vital for achieving consistent results, regardless of lighting conditions. By learning how EV interacts with your camera’s exposure settings, you gain more control over your shots, moving beyond trial and error. Whether you are adjusting EV manually or using EV compensation, this concept is essential for both technical accuracy and creative expression.
2.2 The Scale of Exposure Value
The Exposure Value scale is a numeric system that represents increments, or "stops," of light. Each stop corresponds to a doubling or halving of light, making it easier to calculate exposure changes. For instance, an EV of +2 might represent a brightly lit outdoor scene, while an EV of -2 would be suitable for a dimly lit room.
Understanding this scale allows photographers to anticipate and adapt to a variety of lighting conditions. For example, a snowy landscape might require reducing the EV to prevent overexposure, while a shadowy street scene could need an EV boost to bring out details in darker areas. This system not only simplifies adjustments but also helps photographers work more efficiently by providing a clear framework for exposure decisions.
2.3 EV and Common Scenarios
Exposure Value is especially useful in real-world photography. For example, consider photographing a subject against a bright window. Without adjusting the EV, the camera might expose the bright background, leaving the subject in shadow. By increasing the EV, you can compensate for the backlighting and ensure the subject is properly exposed. Conversely, in high-contrast situations like bright daylight, decreasing the EV helps preserve highlight details and prevent washed-out areas.
By understanding and utilizing Exposure Value, photographers can balance technical precision with creative intent. This knowledge equips you to handle diverse scenarios, from dramatic low-light settings to brightly lit environments, ensuring your images are both impactful and correctly exposed. With practice, EV becomes an intuitive tool, enabling you to focus on storytelling and artistic expression while confidently managing exposure.
3. Why Exposure Value Matters
3.1 The Role of EV in Creative Photography
Exposure Value plays a crucial role in both the technical and artistic aspects of photography. At its core, EV determines how much light enters your camera, affecting the brightness and overall appearance of your image. This adjustment directly influences the mood and emotion conveyed in your photos, making it an essential tool for creative expression.
For instance, by increasing the EV, you can create high-key images with bright and airy tones, perfect for portraits or lifestyle shots. Conversely, decreasing the EV allows you to produce low-key images with deep shadows and dramatic contrast, which is ideal for moody scenes or night photography. By mastering Exposure Value, photographers can transform ordinary scenes into compelling visuals, using light to emphasize the story they want to tell.
Additionally, EV adjustments help manage challenging lighting conditions. For example, in the harsh midday sun, reducing the EV helps prevent overexposed highlights, while increasing it in dim settings ensures that important details are not lost in the shadows. Exposure Value is a powerful tool that allows photographers to adapt quickly to any lighting situation while maintaining creative control.
3.2 Real-World Applications of EV
Exposure Value adjustments are essential in everyday photography scenarios. One common use is balancing exposure in high-contrast environments. For instance, when shooting a subject against a bright background, such as a sunset or a snowy landscape, the camera's metering system might underexpose the subject. Increasing the EV compensates for this, ensuring the subject is properly illuminated without washing out the background.
Another practical application is in low-light photography, where the camera may struggle to expose the scene correctly. By adjusting the EV to a positive value, you can brighten the image and reveal details that would otherwise be hidden. This is particularly useful in situations like indoor events or nighttime street photography.
For professional photographers, Exposure Value is critical for advanced techniques like HDR photography. HDR involves capturing multiple shots at different EV settings and blending them to create an image with a broader dynamic range. This technique ensures both the highlights and shadows are well-exposed, producing a balanced and visually striking result.
Ultimately, understanding and utilizing Exposure Value equips photographers with the ability to handle a variety of lighting conditions and creative challenges. By mastering EV, you can ensure that your images not only achieve technical accuracy but also convey the desired emotion and impact, elevating your photography to the next level.
4. How to Adjust Exposure Value
4.1 Using Your Camera’s EV Settings
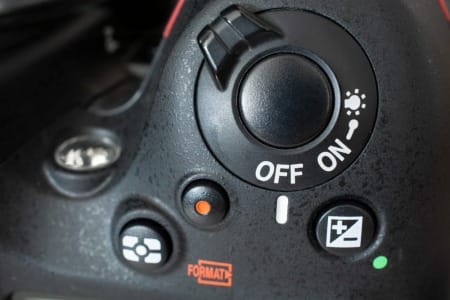
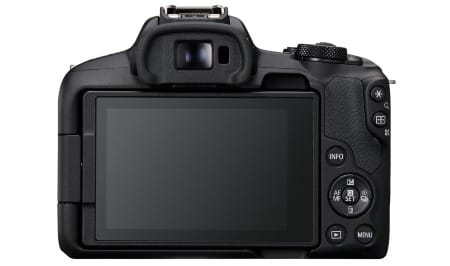
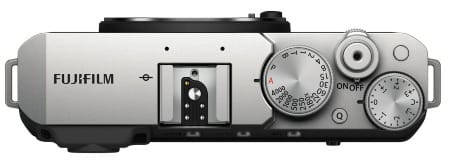
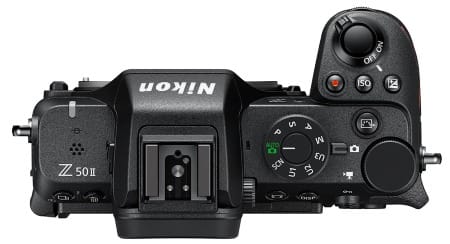
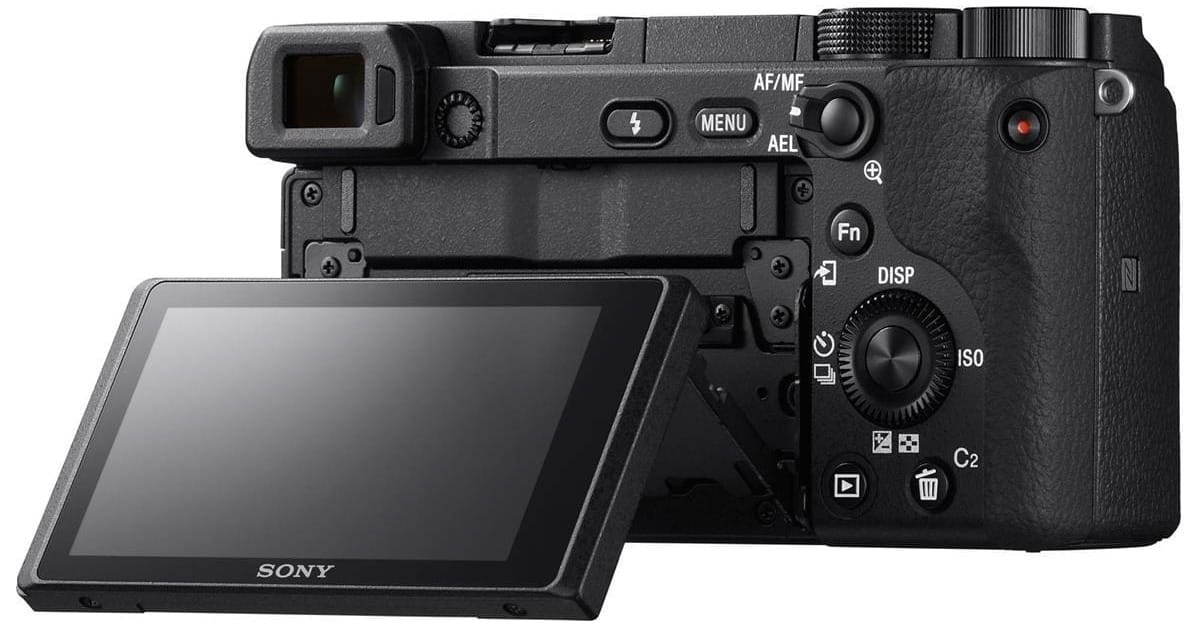
Adjusting Exposure Value is a straightforward process on most modern cameras, and understanding how to use these settings is essential for taking control of your photography. Many cameras feature a dedicated EV compensation button or dial, usually marked with a plus (+) and minus (-) symbol. This allows you to make quick adjustments to the Exposure Value without needing to dive into deeper camera settings.
In manual mode, EV adjustments are done indirectly by altering the aperture, shutter speed, or ISO to achieve the desired exposure. However, in automatic or semi-automatic modes like aperture priority or shutter priority, the EV compensation function becomes invaluable. By using this feature, you can instruct the camera to intentionally overexpose or underexpose an image relative to its default meter reading, giving you creative control even in auto modes.
To get started, identify your camera’s EV adjustment controls by referring to the manual or exploring the camera’s interface. Once located, practice adjusting the EV in small increments and observe how it impacts the brightness and mood of your photos. Familiarity with your camera’s EV settings will make you more confident in capturing well-exposed shots under any conditions.
4.2 When to Increase or Decrease EV
Knowing when to adjust the Exposure Value is key to capturing balanced and visually pleasing images. Increase the EV when the scene is underexposed, such as in backlit situations where the subject appears too dark. For instance, when photographing a person against a bright sky, a positive EV adjustment ensures the subject is properly illuminated without turning the background into a stark silhouette.
Conversely, decrease the EV when the scene is overexposed, such as on a bright, sunny day or when shooting snowy landscapes. Reducing the EV helps prevent washed-out highlights and retains important details in bright areas. With practice, you’ll develop an instinct for recognizing when to tweak EV and how to achieve optimal results.
4.3 Common Challenges with EV Adjustments
Although adjusting Exposure Value is relatively simple, challenges can arise in complex lighting conditions. High-contrast scenes, like those with both deep shadows and bright highlights, require careful EV adjustments to balance the exposure. Overcorrecting EV can lead to loss of detail, either in the highlights or shadows.
To address this, use your camera’s histogram as a guide. A properly balanced histogram ensures that your EV adjustments maintain detail across the tonal range. With time and experience, adjusting Exposure Value will become second nature, enabling you to capture images that are both technically accurate and artistically expressive.
5. Tips for Beginners and Pros
5.1 Practical Tips for Beginners
For beginners, understanding Exposure Value can seem daunting at first, but with a few simple strategies, it becomes an invaluable tool in photography. Start by practicing in environments with stable lighting, such as indoors with consistent artificial light or outdoors on overcast days. This reduces the number of variables, allowing you to focus solely on how EV adjustments affect your image.
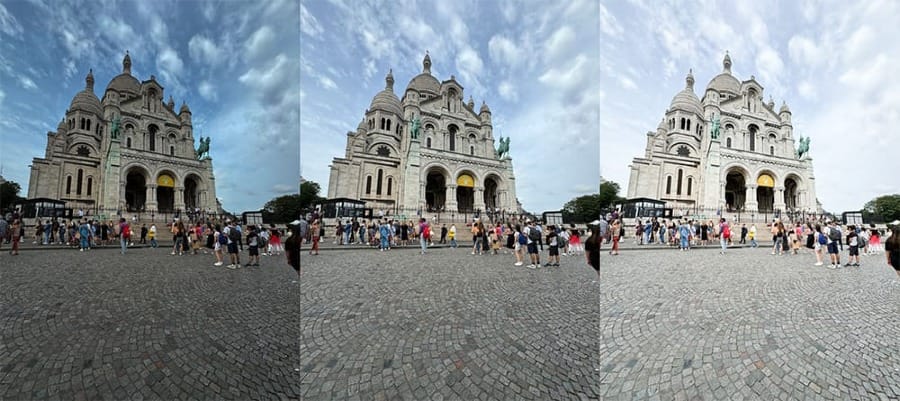
Take one scene and capture multiple shots while varying the EV in small increments, such as -1, 0, and +1. Compare the results to see how increasing EV brightens the image and decreasing EV darkens it. This hands-on experimentation builds confidence and helps you understand how Exposure Value directly impacts the brightness and mood of a photo.
Another tip is to rely on your camera’s light meter as a guide. While the meter provides a good baseline for proper exposure, it’s not always perfect, especially in tricky lighting conditions. Learning to recognize when to use EV adjustments, such as compensating for a backlit subject or preserving details in bright highlights, will elevate your photography skills. With consistent practice, Exposure Value will become second nature, giving you the confidence to tackle more complex lighting scenarios.
5.2 Advanced Techniques for Pros
For experienced photographers, Exposure Value becomes a versatile tool for achieving creative and technical excellence. One advanced technique is using EV adjustments to fine-tune exposure in high-contrast scenes. For instance, slightly decreasing the EV in a bright outdoor setting can help preserve highlight details while allowing shadows to add depth to the composition.
Another method is leveraging Exposure Value in combination with spot metering. This approach lets you focus the exposure on a specific area of the frame, such as the subject’s face while allowing the rest of the scene to fall into shadow or highlight. This creates dramatic and visually compelling images that emphasize the intended focal point.
For photographers working with HDR techniques, varying EV across multiple exposures is essential. Capture a series of shots with different EV settings (e.g., -2, 0, +2) and merge them during post-processing. This ensures that both shadows and highlights are properly exposed, resulting in a final image with enhanced dynamic range.
By incorporating these techniques, both beginners and professionals can harness Exposure Value to adapt to challenging lighting, achieve creative effects, and elevate the quality of their work. Whether you're just starting or refining your craft, mastering EV is a key step in your photography journey.
6. Tools and Accessories to Help with Exposure Value
6.1 Built-In Camera Features
Modern cameras come equipped with several built-in tools to make adjusting Exposure Value more efficient and precise. One of the most commonly used features is the EV compensation dial or button, which allows photographers to adjust the EV in increments, typically ranging from -3 to +3 stops. This feature is particularly helpful in semi-automatic modes like aperture priority or shutter priority, where you can override the camera’s metering to achieve your desired exposure.

Many cameras also include exposure lock functions. By locking the exposure on a specific area of the scene, you can set the Exposure Value based on that point while recomposing your shot. This is useful in situations with uneven lighting, such as when photographing a subject in partial shade. Additionally, cameras with live view or electronic viewfinders often provide real-time feedback on EV adjustments, letting you see how changes impact the exposure before taking the shot.
Another invaluable built-in tool is the histogram, which provides a visual representation of your image’s tonal distribution. By analyzing the histogram, you can ensure that your Exposure Value adjustments avoid clipping in the highlights or shadows, resulting in a well-balanced image.
6.2 External Tools for Precision
For photographers seeking greater precision in setting exposure value, external tools like handheld light meters can be game-changers. A light meter measures the light in a scene and provides recommendations for aperture, shutter speed, and ISO settings to achieve optimal exposure. This eliminates guesswork and is particularly useful for studio photography or complex lighting setups.
Grey cards are another practical accessory. These cards help you set the Exposure Value accurately by providing a neutral reference point for your camera’s metering system. Place the grey card in your scene, meter off it, and adjust your EV accordingly to ensure accurate exposure and color balance.
For advanced users, tethering software can also be an invaluable resource. By connecting your camera to a computer or tablet, you can adjust the Exposure Value in real time while viewing detailed previews of your images on a larger screen. This setup is ideal for studio shoots where precision is critical.
Combining your camera’s built-in features with external tools allows you to achieve precise control over Exposure Value. These tools not only enhance your technical capabilities but also free you to focus on the creative aspects of photography, ensuring that each shot meets your artistic vision.
7. Conclusion
7.1 Recap of Key Takeaways
Exposure Value is a cornerstone concept in photography, providing a systematic way to control and balance the light in an image. It simplifies the interplay between aperture, shutter speed, and ISO, giving photographers a single numeric scale to guide exposure adjustments. Whether you’re a beginner learning the basics or professional fine-tuning advanced techniques, understanding Exposure Value empowers you to create visually compelling images in any lighting condition.
Throughout this guide, we’ve explored the definition of Exposure Value, its practical applications, and the tools available to help you master it. By integrating EV into your photography process, you can achieve not only technical precision but also creative flexibility, adapting your approach to a wide variety of shooting scenarios.
7.2 Encouragement to Practice and Experiment
Learning to use Exposure Value effectively is a journey that requires both practice and experimentation. Start by observing how small EV adjustments impact the brightness and mood of your photos. Take multiple shots of the same scene at different EV settings and analyze the results. Over time, you’ll develop an intuitive understanding of when and how to adjust EV to achieve your desired outcome.
Remember, Exposure Value is not just a technical tool—it’s a creative one. By using EV to emphasize light and shadow, balance highlights and details, or create dramatic effects, you’ll transform your photography into a form of visual storytelling. Keep experimenting, stay curious, and embrace the process of refining your skills. Mastering EV will unlock new possibilities in your photography, helping you capture images that are not only well-exposed but also emotionally resonant.
Thank you for visiting our site and being part of this journey with us! We rely on the generous support of visitors like you to continue providing high-quality. Your donation, no matter the size, helps us maintain the website and create more valuable resources for everyone.

