How to Choose the Best DPI for Printing Photos
Introduction
What is DPI and Why Does It Matter?
When it comes to printing photos, achieving the perfect balance between quality and practicality depends heavily on one critical factor: DPI, or Dots Per Inch. DPI refers to the number of dots a printer can place within a one-inch space on paper. This measurement directly impacts how sharp and detailed a printed photo appears. Whether you're printing a professional portrait or a cherished family snapshot, understanding how to choose the best DPI for printing photos can make the difference between an eye-catching print and a lackluster one.
Many people confuse DPI with PPI (Pixels Per Inch), but they serve different purposes. DPI relates to the printer's output capability, while PPI refers to the resolution of your digital image. Failing to align these properly can lead to suboptimal results, such as pixelation or blurry prints. That's why understanding the basics of DPI is an essential skill for anyone serious about producing high-quality photographs.
Why Choosing the Best DPI for Printing Photos Matters
The importance of DPI lies in its ability to preserve the details and vibrancy of your images. If the DPI is too low, even the most stunning photo can look pixelated and dull when printed. On the other hand, unnecessarily high DPI settings might waste resources without noticeable improvements in quality. This makes it crucial to match your DPI settings to your intended print size and purpose.
This blog will guide you through the key factors to consider when choosing the best DPI for printing photos. From understanding DPI standards to preparing your images for printing, this comprehensive guide will ensure your prints turn out just as beautiful as your digital files. Whether you're a professional photographer or a hobbyist, mastering DPI will elevate your printing game.
Affiliate Disclaimer
This blog post may include links to affiliate sites. If you click on an affiliate link and make a purchase, we may earn a small commission or receive other compensation at no extra cost to you. Please note that many of the links on our site are affiliate links. Our use of these links does not impact the products, services, or websites we recommend to you. This disclaimer covers all forms of communication with you, including our website, email, phone, social media, products, and other platforms.
1. Understanding DPI and Its Role in Printing
What is DPI?
DPI, or Dots Per Inch, refers to the number of dots a printer can apply within a one-inch span on paper. Each dot represents a tiny piece of the image, and collectively, they form the printed picture. The higher the DPI, the more dots are packed into each inch, resulting in greater detail and sharper images. When determining the best DPI for printing photos, it's essential to consider your specific printing needs, as different projects may require varying levels of detail.
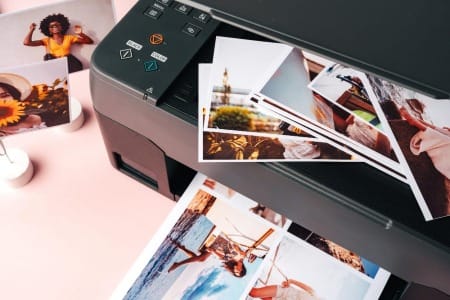
Printers rely on DPI to translate digital images into physical prints, so understanding this metric is fundamental for achieving high-quality results. While DPI is commonly associated with printers, it also correlates with the resolution of digital images, as a low-resolution image may fail to support the intended DPI setting, leading to pixelation or loss of detail.
How DPI Impacts Print Quality
The DPI setting you choose directly influences the clarity, detail, and overall quality of your printed photo. For instance, a 300 DPI print contains significantly more detail than a 72 DPI print because of the higher density of dots per inch. High DPI settings are particularly critical for small, detailed prints such as portraits or professional photos, where clarity matters most.

Conversely, for large prints like posters or banners, lower DPI settings may suffice because these prints are typically viewed from a greater distance. This is why selecting the best DPI for printing photos depends on factors like print size, viewing distance, and the level of detail required.
DPI vs. PPI: Understanding the Difference
A common misconception is equating DPI with PPI (Pixels Per Inch). While both terms deal with resolution, they serve different purposes. DPI refers to the printer's output resolution, while PPI relates to the image's digital resolution. For instance, an image with a high PPI may not produce a clear print if the printer’s DPI is too low or improperly matched. To achieve the best DPI for printing photos, ensure your digital image's PPI aligns with your printer’s capabilities.
Understanding DPI is the first step in mastering the art of photo printing. By tailoring DPI settings to your specific needs, you can ensure your photos retain their vibrancy and detail, resulting in prints that truly stand out.
2. Determining the Best DPI for Your Photo Prints
Factors Affecting DPI Choice
Choosing the best DPI for printing photos requires understanding several factors that influence the quality of the final print. Print size is one of the most critical elements. For smaller prints, such as 4x6 or 8x10, a higher DPI (usually 300 or more) ensures sharpness and detail. On the other hand, larger prints like posters or banners, which are typically viewed from a greater distance, can use a lower DPI, such as 150, without a noticeable loss of quality.
Viewing distance is another key consideration. The closer the viewer is to the printed photo, the higher the DPI should be to ensure that details remain crisp. For example, a photo album or a framed print on a desk requires a higher DPI than a billboard viewed from across the street.
The capabilities of your printer also play a significant role. Most consumer-grade printers support up to 300 DPI, while professional-grade printers can achieve even higher resolutions. Always check your printer’s specifications to ensure you’re using the optimal settings for your photos.
Common DPI Standards
Understanding common DPI standards will help you choose the best DPI for printing photos based on your specific project.
- 300 DPI: This is the gold standard for most photo prints. It ensures fine detail and excellent sharpness, making it ideal for professional photography, wedding albums, and framed artwork.
- 150 DPI: Suitable for large-format prints such as posters, banners, or canvases. At this resolution, the photo retains sufficient detail for its intended viewing distance while reducing file size and printing time.
- 72 DPI: This resolution is designed for digital screens and is not recommended for printing. Images printed at 72 DPI often appear pixelated or blurry.
Matching DPI to Print Size and Purpose
To determine the best DPI for printing photos, match the resolution of your digital file with the desired print size and intended use. For instance, an 8x10 photo at 300 DPI requires a digital file that is at least 2400x3000 pixels. Failing to provide an image with sufficient resolution for the desired DPI can result in poor print quality.
Understanding these standards helps you optimize both your image preparation and printing process. By aligning your print size, viewing distance, and printer capabilities, you’ll achieve prints that look professional and visually appealing. Selecting the best DPI for printing photos is about balancing detail, file size, and practicality to create stunning results every time.
3. How to Choose the Right DPI for Different Printing Scenarios
DPI for Professional Photography Prints
When creating professional-grade prints, such as portraits, fine art photography, or gallery displays, detail is paramount. This is where the best DPI for printing photos is often set at 300 or higher. At this level, prints exhibit sharp lines, smooth gradients, and a level of clarity that showcases the image’s intricacies. High DPI is especially critical for close-up viewing, where every detail of the print will be scrutinized.
Professional photographers often work with printers that can handle even higher DPI settings, such as 600 or more, for specialized projects. However, it’s essential to ensure your digital image resolution aligns with the printer's capabilities. For instance, a high DPI setting will be ineffective if the source file lacks the necessary resolution.

DPI for Canvas and Large-Scale Prints
Large-scale prints, such as canvas art, banners, and posters, present a different set of challenges. These prints are generally viewed from a distance, allowing for a lower DPI without sacrificing visual quality. For such projects, 150 DPI is often sufficient. This resolution balances detail and practicality, reducing the file size and processing time while maintaining a visually appealing result from the intended viewing distance.

Canvas prints also benefit from their textured surface, which can hide minor imperfections in resolution. This means you can achieve impressive results without the need for excessively high DPI settings.
DPI for Everyday Printing
For everyday printing needs, such as family photos, scrapbooks, or casual wall art, the best DPI for printing photos typically falls between 200 and 300. This range provides a balance between high-quality output and efficient printing, ensuring your photos look sharp and vibrant without overwhelming your printer.
Home printers often default to 300 DPI for photo settings, so optimizing your images for this resolution ensures seamless printing. However, if you're printing larger photos or using lower-resolution images, a DPI of 200 can still produce satisfactory results.
Making the Right Choice
Choosing the best DPI for printing photos depends on the context of your project. By understanding the requirements of professional prints, large-scale works, and everyday photos, you can tailor your DPI settings to meet your needs. This approach ensures every print reflects the quality and care you put into capturing the original image. Proper DPI selection enhances the final product, whether it’s a gallery masterpiece or a cherished family keepsake.
4. Preparing Your Photos for Printing at the Best DPI
Resizing Images Without Losing Quality
One of the most important steps in preparing your photos for printing is resizing them to match the intended print size and the best DPI for printing photos. Resizing an image can be tricky because enlarging a photo too much may lead to a loss of quality, resulting in blurry or pixelated prints. To avoid this, always start with a high-resolution image and use specialized software like Adobe Photoshop or Lightroom to adjust the size.

When resizing, focus on maintaining the aspect ratio to prevent distortion. Tools like Photoshop's "Image Size" feature allow you to specify both the dimensions and the resolution (DPI) of your image. If your image's resolution is too low, you may need to use upscaling techniques powered by AI, such as Adobe's Super Resolution feature, to enhance the file without sacrificing detail.
Checking and Adjusting DPI in Popular Software
Adjusting the DPI of an image is straightforward with the right tools. For example:
- In Photoshop: Open your image, go to "Image" > "Image Size," and enter your desired DPI under "Resolution." Ensure "Resample Image" is unchecked if you don’t want to change the file's pixel dimensions.
- In Lightroom: Export settings include options for specifying DPI. Set the resolution to 300 DPI for high-quality prints or adjust as needed for larger formats.
- Free Tools: Tools like GIMP and online editors also allow DPI adjustments, though they may lack advanced features for fine-tuning.

Ensuring the image is optimized for the best DPI for printing photos is essential for professional-looking results.
File Format Considerations
The file format you choose for printing can also impact quality. For high-resolution prints, use formats like TIFF or PNG, which retain image detail without compression artifacts. JPEGs are acceptable for everyday printing but may introduce some loss of quality due to compression. Always save your file in a format that preserves its resolution and supports the chosen DPI.
Final Preparations for Printing
Before printing, double-check that your image’s resolution matches the required DPI for the print size and purpose. By preparing your photos correctly, you ensure they meet the standards of the best DPI for printing photos, resulting in sharp, vibrant, and professional-looking prints that showcase your work at its best. Proper preparation minimizes errors and maximizes the impact of your prints.
5. Troubleshooting DPI and Print Quality Issues
Identifying Common Problems
Even with careful planning, issues with print quality can arise, particularly when DPI settings are not optimized. One common problem is pixelation, where individual pixels become visible, creating a blocky appearance in the printed photo. This typically occurs when the image resolution is too low for the chosen print size or DPI setting. For instance, attempting to print a low-resolution image at 300 DPI often results in noticeable pixelation.

Another frequent issue is blurriness, which can occur when an image is resized improperly or lacks the necessary sharpness. This is particularly problematic for professional prints, where clarity is essential. Poor color reproduction or banding can also detract from print quality, often stemming from mismatched printer settings or file formats.
Recognizing these issues early can help you make the necessary adjustments to achieve the best DPI for printing photos.
Solutions for Low-DPI Images
If you’re working with a low-DPI image but still want to print it at a larger size, there are several strategies to improve quality:
- Upscaling with AI Tools: Software like Adobe Photoshop’s Super Resolution or third-party applications such as Topaz Gigapixel AI can upscale images intelligently, adding pixels without significant loss of detail.
- Reducing Print Size: If upscaling isn’t an option, consider printing the image at a smaller size to maintain clarity.
- Using Filters: Applying subtle sharpening filters in editing software can enhance perceived sharpness, though this won’t add actual resolution.
These techniques can help salvage images and ensure they are closer to the required quality for the best DPI for printing photos.
Working with Print Labs
If you’re using a professional printing lab, take advantage of their expertise to troubleshoot DPI-related issues. Most labs provide detailed guidelines for file preparation, including preferred DPI settings and file formats. When in doubt, consult with their support team to confirm your image meets the specifications for your desired print size.
Additionally, many labs offer proofing services, allowing you to review a test print before committing to the final product. This step ensures your photo prints perfectly, especially when using a specific DPI setting for larger or more detailed works.
Proactive Troubleshooting for Optimal Results
Troubleshooting is an essential part of mastering the best DPI for printing photos. By identifying potential problems early, utilizing advanced tools, and collaborating with professional print labs, you can overcome common challenges. This process ensures your final prints not only meet your expectations but also reflect the quality and attention to detail that your photography deserves. Proper troubleshooting helps turn potential issues into opportunities for improvement, ensuring your work shines in every format.
6. Advanced Tips for Getting the Most Out of DPI Settings
Custom DPI Settings for Specialized Prints
While standard DPI settings like 300 DPI for photos and 150 DPI for large prints work well for most projects, specialized prints often require a more tailored approach. For instance, fine art prints or gallery-quality images may benefit from a DPI as high as 600, ensuring exceptional detail and clarity, even when viewed up close. Similarly, prints on textured materials like canvas or fabric may need adjustments to compensate for surface irregularities.
When working with unique materials, test a small sample print to evaluate the result before committing to a final print. Experimenting with DPI settings allows you to find the perfect balance between detail and practicality, ensuring the best DPI for printing photos in specialized formats.
Saving Presets for Future Projects
If you frequently print photos in specific formats, creating custom DPI presets can save time and ensure consistency. Most professional software, like Adobe Photoshop and Lightroom, allows you to save export settings, including DPI, resolution, and file format. By creating presets for common print types, such as 300 DPI for standard photos or 150 DPI for posters, you streamline your workflow and eliminate the risk of forgetting critical adjustments.
To set up a preset in Photoshop, adjust your export settings to the desired resolution and DPI, then save the configuration as an action. Similarly, in Lightroom, you can save these settings as part of an export preset. This is particularly useful for photographers who regularly print large volumes of work and need a consistent approach to achieve the best DPI for printing photos.
Combining DPI with Color Management
Optimizing DPI is only one part of ensuring high-quality prints. For truly professional results, pair your DPI adjustments with proper color management. Calibrate your monitor to ensure that colors display accurately, and use ICC profiles provided by your print lab or printer manufacturer to match your print output with your digital files.
Color management and DPI work hand in hand, especially for prints with vibrant hues or subtle tonal gradients. Ensuring both are finely tuned guarantees a final print that matches your creative vision and adheres to the best DPI for printing photos.
Elevate Your Printing Game with Advanced Techniques
By mastering advanced techniques like customizing DPI for specialized prints, saving efficient presets, and integrating color management, you can elevate your photo printing process to a professional level. These tips ensure that your photos consistently look their best, regardless of format or medium, while maximizing the potential of the DPI settings you choose.
Conclusion
Mastering the Art of Choosing the Right DPI
Choosing the best DPI for printing photos is an essential skill for anyone looking to create high-quality prints. DPI determines the clarity and sharpness of your photos and directly impacts how well they translate from digital format to physical media. By understanding how DPI works, how it interacts with image resolution, and how to adjust it for various printing scenarios, you can take control of your photo printing process and ensure consistent, professional results.
From selecting the optimal DPI for professional portraits to adjusting settings for large-scale posters or canvas prints, tailoring your approach to the specific project is key. The best DPI for printing photos varies based on factors such as print size, viewing distance, and the medium you’re using. Following the guidelines and advanced tips outlined in this guide will help you avoid common pitfalls like pixelation and blurriness while ensuring that your prints showcase your work at its finest.
Whether you’re printing cherished memories for your home or preparing an art display for a gallery, the right DPI settings will make all the difference. By mastering this vital aspect of photo printing, you can elevate your images to their full potential.
Thank you for visiting our site and being part of this journey with us! We rely on the generous support of visitors like you to continue providing high-quality. Your donation, no matter the size, helps us maintain the website and create more valuable resources for everyone.

