Landscape Photography Settings
Introduction
- Why Landscape Photography is Unique
Landscape photography is one of the most captivating genres, allowing photographers to immerse themselves in the beauty of nature while capturing the essence of vast scenes. Whether it’s a majestic mountain range, a serene beach at sunrise, or the glowing colors of a sunset, the appeal lies in the photographer’s ability to convey the grandeur and atmosphere of the environment. However, achieving a compelling landscape image requires more than just framing a picturesque scene—it requires precise control over camera settings to ensure sharpness, depth, and proper exposure across a wide expanse of the frame. - Why Settings Matter for Landscape Photography
Capturing the perfect landscape shot depends on understanding how different camera settings work together to create a visually stunning image. Factors like aperture, shutter speed, ISO, and white balance all influence the outcome, and even minor adjustments can drastically change the photo’s appearance. For example, selecting the wrong aperture could result in a shallow depth of field, leaving parts of the scene out of focus, while an incorrect ISO might introduce unwanted noise. This guide will walk you through the essential camera settings for landscape photography, helping you optimize your equipment to consistently produce high-quality results. - Catering to All Levels of Photographers
Whether you’re a beginner still getting comfortable with your camera’s manual mode or a seasoned professional looking for a refresher, this post is designed for you. We’ll break down each setting in a practical way, explaining its role and why it matters specifically for landscape photography. Along the way, we’ll provide tips on when and how to adjust these settings depending on the lighting, weather conditions, and composition you’re working with. This ensures that you have a reliable framework to approach any landscape scenario with confidence.
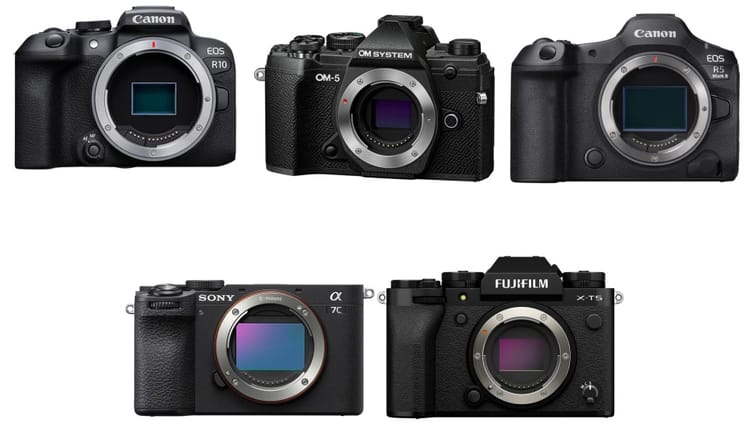
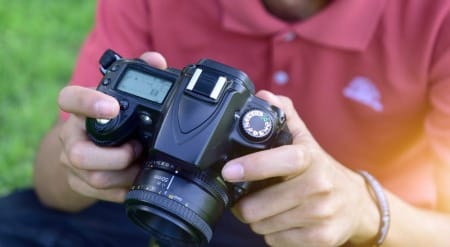
1. Camera Mode: Manual vs. Aperture Priority
When shooting landscapes, the camera mode you choose has a significant impact on your creative control. Two common modes to consider are Manual Mode and Aperture Priority Mode, each offering different levels of control and flexibility.
- Manual Mode (M): Complete Control
Manual mode allows you to adjust all settings—aperture, shutter speed, and ISO—independently, giving you full control over exposure. This mode is ideal for landscape photographers who want to fine-tune every aspect of their shot, particularly in stable lighting conditions where there’s no need for rapid adjustments. You can deliberately select a narrow aperture for greater depth of field, a slow shutter speed to capture motion, and a low ISO to reduce noise, ensuring every element in your frame is perfectly captured. - Aperture Priority Mode (A or Av): Semi-Automatic Flexibility
Aperture Priority is a semi-automatic mode where you select the aperture, and the camera automatically adjusts the shutter speed to achieve the correct exposure. This mode is particularly useful when lighting conditions are constantly changing, such as during sunrise or sunset. By prioritizing aperture, you maintain control over the depth of field—crucial for landscapes—while allowing the camera to handle exposure adjustments. This option is often favored by those who want efficiency without sacrificing control over key settings like aperture.
Both modes have their strengths, and choosing between them depends on the level of control and flexibility you need in different scenarios.
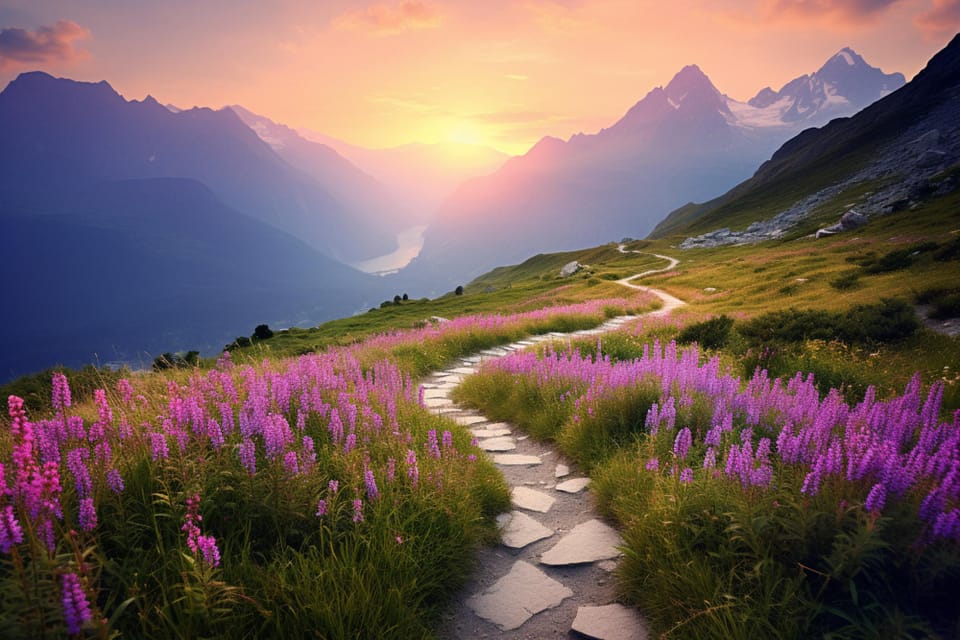
2. Aperture Settings: Achieving Depth of Field
Aperture plays a crucial role in landscape photography, as it directly affects the depth of field—the range of distance in focus. For landscapes, the goal is often to keep everything sharp from the foreground to the background, which requires choosing the right aperture setting.

- Optimal Aperture Range: f/8 to f/16
Most landscape photographers use an aperture between f/8 and f/16, which is considered the sweet spot for achieving both sharpness and depth of field. At these apertures, you’ll typically get a wide depth of field, ensuring that both near and distant elements in the scene remain sharp. This is especially important in landscape shots, where you want details in both the foreground (e.g., rocks, plants) and background (e.g., mountains, sky) to be in focus. - Avoiding Diffraction: The Risks of Small Apertures
While it might be tempting to use smaller apertures like f/22 or higher to increase the depth of field further, this can lead to diffraction—a phenomenon where the light bends around the aperture blades, softening the image. Diffraction can reduce overall sharpness, negating the benefits of using such a small aperture. To balance sharpness and depth, it’s generally recommended to stick to apertures in the f/8 to f/16 range, which offers the best optical performance.
By mastering aperture control, you’ll be able to capture landscapes with maximum detail and clarity, ensuring that your entire scene is in focus.
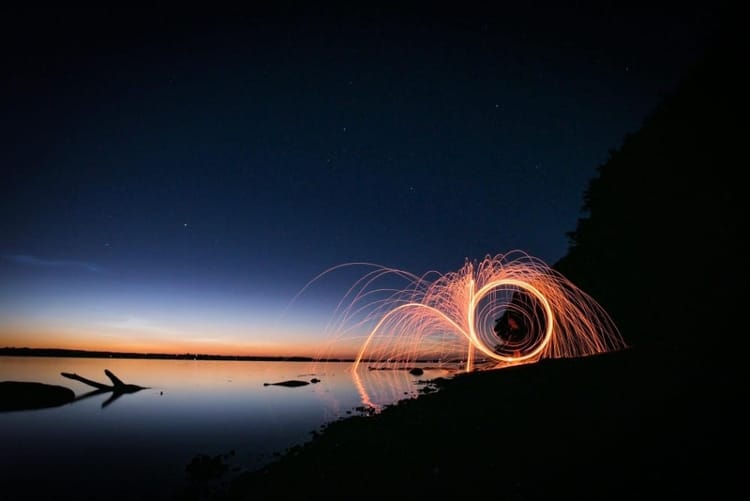
3. Shutter Speed: Balancing Exposure and Sharpness
Shutter speed is a critical factor in landscape photography, as it determines how motion is captured and directly influences the overall exposure of your image. Depending on the scene, the choice of shutter speed can either freeze action for crisp detail or create a sense of motion to convey dynamic elements, such as flowing water or moving clouds.
- Standard Shutter Speeds for Static Scenes
For static landscapes where there’s little to no movement, a shutter speed between 1/8 to 1/60 of a second is usually ideal. These speeds allow you to maintain a balanced exposure without introducing motion blur, provided the camera is stable, preferably mounted on a tripod. This range is suitable for shooting under normal daylight conditions when you don’t want to introduce any deliberate motion effects but aim for a crisp and clear image of stationary subjects like mountains, trees, or valleys. - Long Exposures for Motion Blur
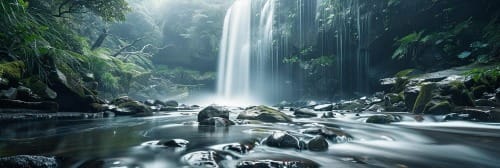
One of the most artistic uses of shutter speed in landscape photography is to create long exposure effects. By selecting a slower shutter speed, typically anywhere from 1 second to several minutes, you can create beautiful motion blur in elements like flowing rivers, waterfalls, or moving clouds. Long exposures transform water into a smooth, ethereal surface and make clouds appear like soft streaks across the sky, adding a surreal, dreamlike quality to the image. A tripod is essential when using long exposures, as even the slightest camera shake can cause unwanted blur in the entire image. - Using Shutter Speed with Filters
In bright daylight conditions, it’s difficult to achieve long exposures without overexposing the image. This is where Neutral Density (ND) filters come in handy. ND filters reduce the amount of light entering the lens, allowing for longer exposures even in bright conditions. For example, an ND filter can let you shoot a long exposure of a waterfall in midday light, ensuring proper exposure while still achieving that silky motion blur effect.
By understanding how to manipulate shutter speed, you can creatively control the way motion is depicted in your landscapes, balancing sharpness with artistic blur to capture the scene exactly as you envision it.
4. ISO Settings: Keeping Noise to a Minimum
ISO is a key setting in landscape photography that determines the camera’s sensitivity to light. While it plays a crucial role in exposure, especially in low-light conditions, adjusting ISO comes with trade-offs—particularly in terms of image noise. For landscape photographers, achieving a clean, sharp image is essential, which is why managing ISO settings correctly is important.
- Base ISO: Start Low for the Cleanest Image
In most cases, the lowest ISO setting on your camera—typically ISO 100 or 200—is ideal for landscape photography. This is referred to as the camera's base ISO and delivers the highest image quality with the least amount of noise. Shooting at a low ISO keeps your images crisp and detailed, which is crucial when capturing intricate textures like rocks, trees, or clouds. Additionally, when shooting with a low ISO, you have the greatest flexibility to recover shadows and highlights in post-processing without introducing unwanted grain or degrading image quality. - When to Increase ISO
While it’s best to keep ISO low, there are situations where you might need to increase it. In low-light conditions, such as early morning or late evening, you may need to boost the ISO to avoid underexposing your image. However, it’s important to be cautious—raising ISO beyond ISO 400 or 800 can introduce noise, particularly in the shadows and darker areas of the image. To minimize noise, use the lowest ISO possible while balancing other settings, such as aperture and shutter speed, to achieve the correct exposure. - Long Exposures and ISO
If you’re shooting with a tripod, you can often afford to keep ISO low, even in darker conditions, by using a slower shutter speed to gather more light. This technique allows you to maintain image quality without the need to increase ISO, ensuring that noise is kept to a minimum while still capturing well-exposed, sharp landscapes.
By managing ISO thoughtfully, you can reduce the risk of noise and maintain the clarity and sharpness that are essential for impactful landscape photography.
5. Focus Settings: Maximizing Sharpness
Achieving sharp focus across the entire frame is crucial in landscape photography. Unlike portraits or action shots, where selective focus can be used creatively, landscapes generally require the entire scene—from the foreground to the distant horizon—to be in sharp focus. This requires careful attention to focus settings and techniques to ensure the best results.
- Manual Focus for Precision
While autofocus is a reliable tool in many photography genres, landscape photographers often prefer manual focus for greater precision. Autofocus systems can sometimes struggle with large, complex scenes, especially in low-light conditions or when there isn’t a clear subject to lock onto. Switching to manual focus allows you to take control of where the camera focuses, ensuring that the most important elements in your scene are tack-sharp. This is particularly useful when shooting with a tripod, where you have the time to carefully compose your shot and fine-tune your focus. - Hyperfocal Distance: Maximizing Depth of Field
One of the most effective techniques for ensuring sharpness throughout a landscape image is focusing on the hyperfocal distance. Hyperfocal distance is the point at which everything from half that distance to infinity appears acceptably sharp. By focusing on this specific point, you can maximize the depth of field and achieve sharp focus from the foreground to the background. There are apps and charts available that can help you calculate the hyperfocal distance based on your lens, aperture, and sensor size, but a general rule of thumb is to focus about one-third of the way into your scene. - Using Live View for Focus Accuracy
A helpful tool for achieving precise focus in landscape photography is your camera’s live view function. By activating live view and zooming in on the scene, you can manually adjust focus with greater accuracy. This is especially useful when shooting at small apertures where precise focus is critical or when working in challenging light conditions.
By mastering manual focus, understanding hyperfocal distance, and using live view for fine adjustments, you can ensure that your landscape images are sharp and detailed throughout the frame, bringing out the full beauty of the scene.
6. White Balance: Achieving Natural Colors
White balance is a critical setting in landscape photography that affects the color temperature of your image. It helps ensure that colors appear natural and true to life by compensating for the color cast created by different lighting conditions. Whether you’re shooting under the warm light of a sunset or the cool light of a cloudy day, getting your white balance right is key to capturing landscapes with accurate colors.
- Auto White Balance (AWB): A Convenient Default
Most cameras have an Auto White Balance (AWB) setting, which does a decent job of adjusting the white balance automatically based on the available light. For many landscape situations, AWB can work well, especially in mixed or changing lighting conditions. However, there are times when AWB may not perfectly capture the true colors of the scene, especially during golden hour or in extreme lighting situations where the camera might overcorrect the warmth of the scene, making it appear too neutral. - Custom White Balance for Better Accuracy
For more control over color representation, especially in specific lighting conditions, you can set a custom white balance or choose a preset. For example:- Daylight for sunny conditions to maintain natural colors.
- Cloudy for overcast days to add warmth to the image.
- Shade to counteract the cool tones in shaded areas.
- Post-Processing Flexibility: Shooting in RAW
If you’re shooting in RAW format, you don’t need to worry too much about white balance in the field because it can be fully adjusted in post-processing without affecting image quality. This gives you the flexibility to tweak the color balance later, ensuring the final image reflects the true mood and lighting of the scene.
By understanding and adjusting white balance settings, you can capture landscapes with natural and vibrant colors, perfectly representing the scene as you saw it.
7. Shooting in RAW: Retaining Maximum Detail
One of the most important decisions a landscape photographer can make is choosing to shoot in RAW format rather than JPEG. While JPEG files are smaller and easier to manage, RAW files offer far greater flexibility and image quality, making them ideal for landscape photography where retaining detail and dynamic range is critical.
- Why RAW is Essential
RAW files contain all the data captured by your camera’s sensor without any compression or in-camera processing. This means they retain much more detail than JPEGs, particularly in the highlights and shadows. When you’re photographing landscapes, this is crucial because natural scenes often have a wide range of light levels—from bright skies to deep shadows. Shooting in RAW ensures that you capture all the information in those areas, giving you the ability to recover details in post-processing that might otherwise be lost in a compressed JPEG file. - Post-Processing Flexibility
Another significant advantage of RAW files is the flexibility they offer in post-processing. Since RAW files store more information, you can make adjustments to exposure, contrast, and white balance without degrading the image quality. This is especially useful for landscapes, where lighting conditions can be tricky, and you might need to adjust the exposure later. For example, if the sky is too bright or the shadows are too dark, you can easily correct these areas in post-processing without introducing noise or losing detail. - RAW vs. JPEG
While JPEG files are compressed and processed by the camera, which limits editing potential, RAW files allow for much greater control over the final image. Though they take up more storage space and require more processing time, the added detail and flexibility are well worth it for landscape photographers who want the best possible results.
By shooting in RAW, you ensure that your landscape photos retain maximum detail and dynamic range, giving you full control over the final image in post-processing.
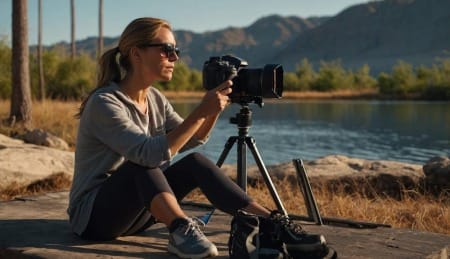
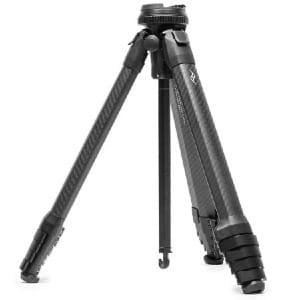
8. Using a Tripod: Essential for Sharp Landscapes
A tripod is one of the most important tools in a landscape photographer’s kit. While you can often hand-hold your camera in other photography genres, capturing sharp, detailed landscapes often requires long exposure times and perfect stability, which only a tripod can provide.
- Stability for Long Exposures
One of the key reasons to use a tripod in landscape photography is to achieve complete stability during long exposures. Whether you’re shooting a flowing waterfall or capturing the movement of clouds at sunset, long shutter speeds (sometimes several seconds or even minutes) are necessary to convey a sense of motion or to properly expose a scene in low light. Any slight movement of the camera can introduce blur, ruining the sharpness of the image. A sturdy tripod ensures that your camera remains still, allowing you to capture crystal-clear shots even with slow shutter speeds. - Practical Tips for Tripod Use
When using a tripod, it’s important to take additional steps to minimize camera shake. One effective method is using a remote shutter release or your camera’s 2-second timer to trigger the shot without physically touching the camera. Even the slight press of the shutter button can cause vibrations that affect image sharpness. Additionally, make sure your tripod is set on a stable surface and that its legs are fully extended and locked to prevent any movement, especially in windy conditions.
By using a tripod, you gain the ability to use slower shutter speeds, resulting in sharp, well-exposed landscape photos that capture the full beauty of the scene.
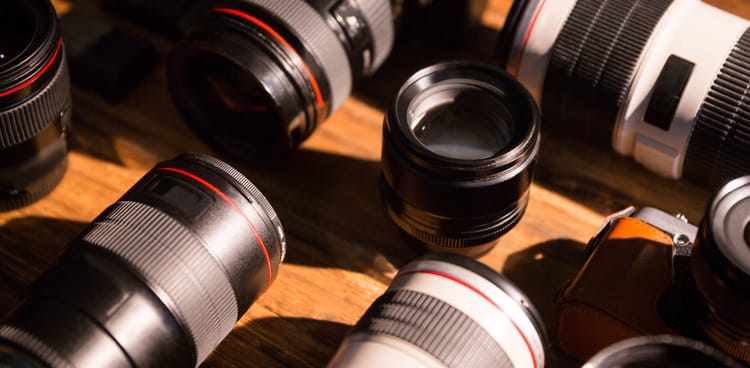
9. Additional Considerations: Filters for Landscape Photography
Filters are an invaluable tool in landscape photography, allowing you to control the light entering your lens and enhance specific elements of the scene. By using the right filters, you can capture more balanced exposures, reduce glare, and bring out vibrant colors in your images. Three types of filters are particularly useful for landscape photographers: polarizing filters, neutral density filters, and graduated neutral density filters.
- Polarizing Filters
A polarizing filter is great for reducing reflections from water, glass, and other reflective surfaces. It also deepens the color of the skies, making clouds stand out and giving the sky a rich blue tone. Additionally, a polarizer enhances the saturation of foliage and reduces atmospheric haze, making it a must-have when shooting scenes with water, skies, or vibrant natural elements.

- Neutral Density (ND) Filters
ND filters reduce the amount of light entering the lens, allowing for longer exposures without overexposing the image. This is particularly useful when shooting in bright daylight, such as capturing the smooth flow of a waterfall or the movement of clouds over a bright sky. By using an ND filter, you can use slower shutter speeds to create motion blur effects even in bright conditions. - Graduated ND Filters
Graduated ND filters are especially helpful in balancing the exposure between a bright sky and a darker foreground. They transition from dark at the top to clear at the bottom, allowing you to reduce the brightness of the sky without underexposing the landscape. This results in a more balanced and evenly exposed shot, preserving details in both the highlights and shadows.
By incorporating these filters into your landscape photography kit, you can achieve more creative and technically superior results, allowing for greater control over light and color in your images.
Conclusion
Mastering the settings for landscape photography is essential for capturing breathtaking, sharp, and well-exposed images that do justice to the beauty of nature. By understanding how to balance key elements like aperture, shutter speed, ISO, and focus, you can gain full control over your camera and consistently produce high-quality landscape photos. The right aperture ensures that both the foreground and background are sharp, while the appropriate shutter speed allows you to either freeze motion or introduce creative blur for a dynamic effect. Keeping your ISO low minimizes noise, preserving the clarity and detail that are so vital in landscapes.
Beyond the basic settings, tools like RAW shooting, a tripod, and filters give you even more creative control. Shooting in RAW ensures you retain maximum detail and dynamic range while using a tripod stabilizes your camera for long exposures and sharpness. Filters like polarizers and ND filters further enhance your images by controlling reflections, boosting color saturation, and balancing exposure between the sky and the land.
Ultimately, landscape photography is about finding the right balance between technical precision and artistic vision. With practice, these settings become second nature, allowing you to focus on composing beautiful images that capture the essence of the natural world. So get out there, experiment with your camera settings, and create stunning landscapes!