Lights for Studio Photography: Essential Tools for Professional-Quality Images
Studio photography relies on good lighting to create stunning images. The right lights can make or break your photos. You need to choose equipment that fits your needs and budget.
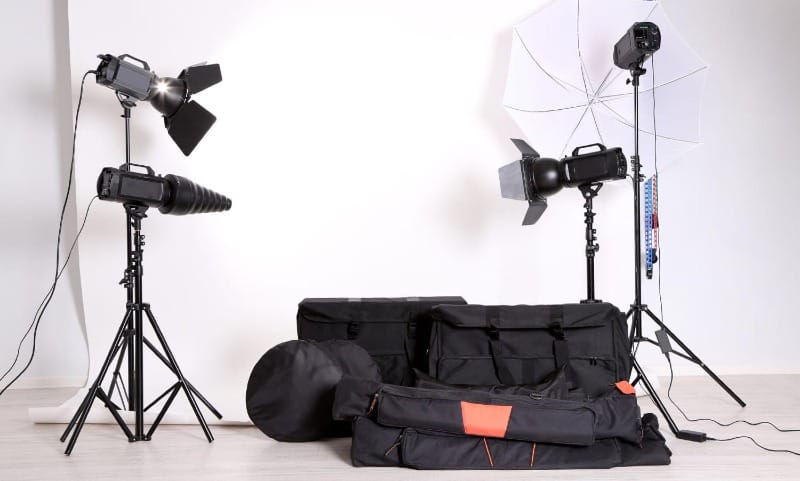
A basic studio lighting kit includes softboxes, light stands, and continuous or strobe lights. Softboxes diffuse the light for a softer look. Stands let you position lights where you want them. Continuous lights stay on, while strobes provide quick bursts of light.
You can start with a simple 2-light setup and add more as you grow. Look for kits with adjustable power and color temperature. This lets you control the brightness and warmth of your lighting. With practice, you'll learn to shape and mold light to bring your creative vision to life.
Understanding Studio Lighting Basics
Studio lighting forms the foundation of professional photography. It shapes the mood, highlights details, and brings your vision to life. Mastering these basics will elevate your images.
Types of Studio Lights
Continuous lights stay on constantly. They let you see exactly how the light falls on your subject. LED lights are popular for their low heat and energy efficiency. Tungsten lights give a warm glow but can get hot. Fluorescent lights offer a cooler tone and work well for video.

Strobe lights flash when you take a photo. They're powerful and freeze motion. Flash duration is very short, perfect for capturing fast action. Strobes recycle quickly, allowing you to shoot rapidly.
Natural light from windows can complement artificial sources. It's soft and flattering but changes throughout the day. You'll need to adjust your setup as the sun moves.
Characteristics of Light
Light quality affects the mood of your photos. Soft light wraps around subjects, reducing shadows. It's flattering for portraits. Hard light creates strong shadows and high contrast. It's dramatic and eye-catching.
Color temperature measures the warmth or coolness of light. Tungsten lights are warm, while LEDs can vary. Fluorescents tend to be cool. You can adjust the white balance in your camera to match.
Light direction shapes your subject. The front lighting is flat but reveals details. Side lighting adds depth and texture. Backlighting creates silhouettes and rim lighting effects.
Lighting Equipment Essentials
Light stands hold your lights steady. Get sturdy ones that can support your heaviest lights. Boom arms let you position lights overhead or at angles.
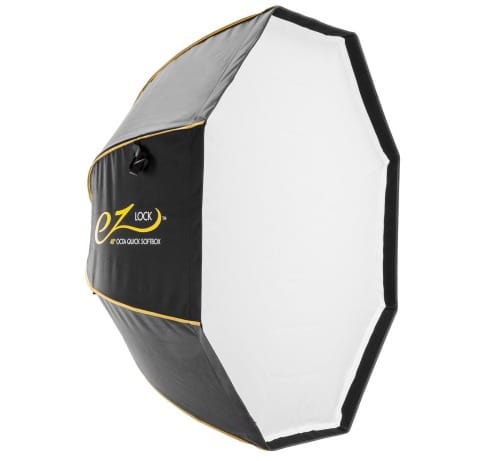
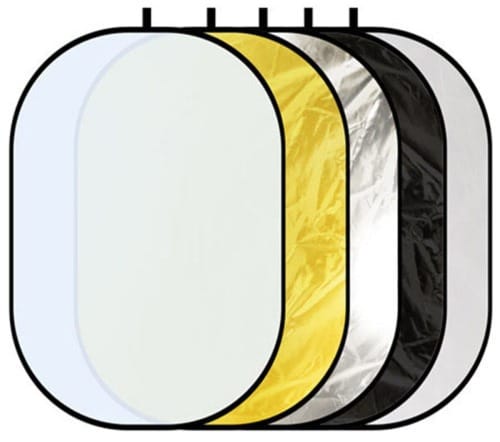
Modifiers shape and control light. Softboxes diffuse light, creating a soft glow. Umbrellas spread light widely. Grids focus light into a narrow beam. Reflectors bounce light to fill shadows.
Backdrop stands and seamless paper create clean backgrounds. V-flats are large panels used to reflect or block light. Gels change light color for creative effects.
A light meter helps you measure precise light levels. It ensures consistent exposure across multiple lights.
Studio Light Modifiers and Their Impact
Light modifiers shape and control studio lighting. They affect the quality, direction, and intensity of light in your photos. The right modifier can make a big difference in your shots.
Softboxes and Umbrellas
Softboxes create soft, even light. They come in many sizes and shapes. Large softboxes make smooth, wrap-around light. Small ones give more focused light.
Umbrellas are easy to use and portable. Shoot-through umbrellas soften the light a lot. Reflective umbrellas give stronger light with more contrast. White umbrellas make neutral light. Silver ones create cooler tones.
Both tools are great for portraits. Softboxes offer more control. Umbrellas are simpler and faster to set up.
Reflectors and Grids
Reflectors bounce light onto your subject. They fill in shadows and add highlights. White reflectors give a soft light. Silver ones make stronger, cooler light. Gold reflectors add warm tones.
Grids focus light into a narrow beam. They help control spills and make dramatic lighting. Grids come in different sizes. Tighter grids make smaller light spots.
Use reflectors to soften shadows in portraits. Grids work well for hair lights or accent lighting.
Specialized Modifiers
Beauty dishes create a mix of soft and hard light. They're popular for fashion and beauty shots. The light is crisp but flattering.
Barn doors let you shape the light beam. They're good for hair lights and background lights. You can make strips or squares of light.
Snoots make a very narrow beam of light. Use them to light small areas or create dramatic effects.
Gels change the color of your lights. They're useful for matching ambient light or creating mood. Blue gels can simulate moonlight. Orange ones can mimic a sunset.
Setting up Your Lighting Kit
Getting your lighting kit ready is key for great studio photos. The right gear and setup can make a big difference in your shots.
Choosing the Right Lighting Kit
Start with a basic kit that fits your needs and budget. A good starter set often includes two or three lights, stands, and modifiers. Brands like Neewer and Godox offer affordable options for beginners.
For continuous lighting, LED panels work well. They let you see the light effect right away. If you prefer flash, look for strobe lights or speedlights. These give more power for freezing action.
Make sure your kit has adjustable light stands. They help you position lights at different heights. Softboxes or umbrellas are useful for softening harsh light. A reflector can also come in handy for filling in shadows.
Positioning Lights for Optimal Results
Start with a key light as your main source. Place it at a 45-degree angle to your subject. This creates nice shadows and depth.
Add a fill light opposite the key light to soften shadows. Keep it less bright than the key light for a natural look.
A rim light behind your subject can create a glowing edge. This helps separate them from the background.
Try different setups like butterfly lighting or Rembrandt lighting. Butterfly puts the main light right above the camera. Rembrandt creates a triangle of light on one cheek.
Move lights closer for softer light or farther for harder light. Small tweaks can make a big impact on your photos.
Advanced Studio Lighting Techniques
Advanced studio lighting opens up new creative possibilities for photographers. These techniques let you capture unique images and push your skills to the next level.
High-Speed Sync and TTL
High-speed sync (HSS) allows you to use flash at faster shutter speeds. This is great for freezing motion or using wide apertures in bright light. TTL metering makes flash exposure easier by automatically adjusting power.
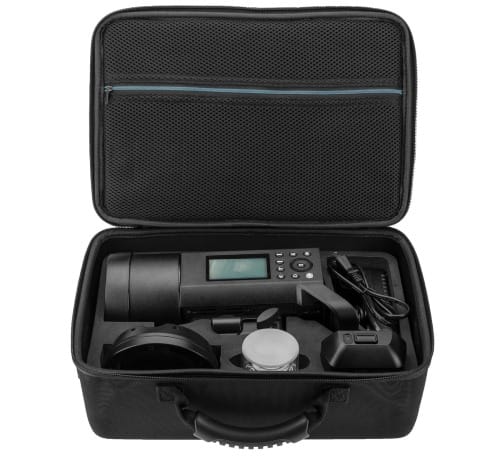
To use HSS, you need compatible flashes like speed lights or studio strobes with HSS support. The Godox AD200 Pro and Profoto D2 both offer HSS. Set your camera to manual mode and choose a shutter speed faster than your sync speed.
TTL uses your camera's metering system to set flash power. It's useful for quickly changing scenes. Many modern speed lights and some studio lights have TTL. The flashpoint system offers affordable TTL options.
Creative Uses of Color and Effects
Color gels let you add creative hues to your lighting. Place gels over your flash units to tint the light. This can set a mood or match ambient lighting.
For dramatic portraits, try split lighting. Place a light at a 90-degree angle to your subject. This lights one side of the face while leaving the other in shadow.
Low-key lighting creates a moody look with lots of shadows. Use a single light source and position it to the side of your subject. Block other light with flags or gobos.
Wireless triggering gives you more freedom to position lights. Many systems like Elinchrom and Profoto offer reliable wireless control. This lets you adjust power and settings from your camera.
Lighting Considerations for Different Photography Genres
Different types of photography need different lighting setups. The right lights can make your photos stand out. Let's look at how to light portraits, products, and videos.
Portrait Photography
For portrait photos, soft light is key. Use a large softbox or umbrella to spread the light. This gives smooth shadows and flatters the face. Put your main light to one side of the camera. Add a fill light on the other side to reduce harsh shadows.
Beauty dishes work well for glamour shots. They create a mix of soft and hard light that shows skin texture. For dramatic portraits, try a single light with a grid. This creates a spotlight effect.
Remember to match your lighting to the mood you want. Bright, even light works for happy portraits. Low-key lighting with more shadows fits serious or moody shots.
Product Photography
Product photos need clean, even lighting. Use at least two lights to remove shadows. Soft boxes or diffusers help spread the light evenly. This shows off the product's details and colors.
For shiny items like jewelry, use a light tent. This fabric box diffuses light from all sides. It reduces reflections and glare.
Small products often look best with tabletop lighting. Use LED panels or small strobes. These fit in tight spaces and give you control. Adjust the lights to highlight the product's best features.
Videography Lighting Essentials
Video lighting needs to stay consistent. Use continuous lights instead of flashes. LED panels are popular for video. They're bright, cool to the touch, and often dimmable.
Set up a basic three-point lighting system. Use a key light as your main source. Add a fill light to soften shadows. The backlight separates your subject from the background.
For interviews, soft light looks best on faces. Use large softboxes or bounce the light off a white wall. This creates a natural, flattering look. Adjust your lights to match the scene's mood and style.
Conclusion
Studio lighting is a powerful tool for photographers. It gives you control over your images. With the right lights, you can create any mood or effect you want.
Start with basic setups and practice often. Try different light positions and modifiers. This will help you learn how light shapes your subjects.
Remember that good lighting enhances your subject's best features. It can hide flaws and create drama. The key is to match your lighting to your creative vision.
Keep experimenting with new techniques. Studio lighting skills grow with time and practice. Soon, you'll be able to light any scene with confidence.
Don't be afraid to break the rules sometimes. Your unique style will develop as you gain experience. The studio becomes your playground for creating amazing photos.