Mastering Manual Camera Settings: A Quick Start Guide
Introduction
In the world of photography, mastering manual camera settings is a powerful skill that can take your images from ordinary to exceptional. While automatic modes on cameras are convenient, they often limit creative control by making choices for you, adjusting exposure, and other factors based on pre-set algorithms. By understanding and using manual settings, you gain the freedom to make deliberate choices that influence how your photos turn out.
Learning manual settings might feel overwhelming at first, especially with terms like ISO, aperture, and shutter speed coming into play. However, breaking down each component and understanding how they interact will transform your photography. Each setting affects aspects like exposure, motion, and depth, which can dramatically change the mood and style of a photo.
This quick start guide is designed to simplify the process, providing you with essential information to get started with manual camera settings confidently. Whether you're aiming for sharp landscapes, dreamy portraits, or action-packed shots, these settings will help you develop the skills needed to capture your vision exactly as you see it.
Affiliate Disclaimer
This blog post may include links to affiliate sites. If you click on an affiliate link and make a purchase, we may earn a small commission or receive other compensation at no extra cost to you. Please note that many of the links on our site are affiliate links. Our use of these links does not impact the products, services, or websites we recommend to you. This disclaimer covers all forms of communication with you, including our website, email, phone, social media, products, and other platforms.
1. Understanding Manual Camera Settings Basics
What Are Manual Camera Settings?
Manual camera settings allow photographers to take full control of their cameras, adjusting key parameters independently to achieve the desired look and feel in their images. Unlike automatic modes, which determine exposure and focus based on the camera's built-in algorithms, manual settings require the user to set exposure, ISO, aperture, and shutter speed manually. This approach might feel intimidating at first, but it gives you unparalleled control over the outcome of each shot.
In manual mode, you’re able to make decisions based on your creative intentions rather than letting the camera guess what you want. Whether you're aiming for a perfectly exposed landscape or an artistic shot with intentional motion blur, manual camera settings give you the flexibility to tailor each photo to your vision.
| Scenario | ISO | Aperture (f-stop) | Shutter Speed | Effect / Use |
|---|---|---|---|---|
| Bright Sunlight | 100-200 | f/8 - f/16 | 1/500 - 1/1000 sec | Captures detail with low noise; ideal for landscapes |
| Cloudy Day / Shade | 200-400 | f/5.6 - f/11 | 1/250 - 1/500 sec | Balances light and depth; useful for outdoor portraits |
| Indoor (Well-lit) | 400-800 | f/2.8 - f/5.6 | 1/60 - 1/125 sec | Maintains clarity in indoor light without flash |
| Low Light / Dusk | 800-1600 | f/2.8 - f/4 | 1/30 - 1/60 sec | Captures detail with minimal noise; use stabilization |
| Night Photography | 1600+ | f/2.8 or wider | 1 - 30 sec (long exposure) | Suitable for low light; tripod recommended for stability |
| Action / Sports | 200-800 | f/4 - f/8 | 1/1000 - 1/2000 sec | Freezes motion, ideal for fast-moving subjects |
| Portraits (Background Blur) | 100-400 | f/1.8 - f/4 | 1/60 - 1/250 sec | Isolates subject with a shallow depth of field |
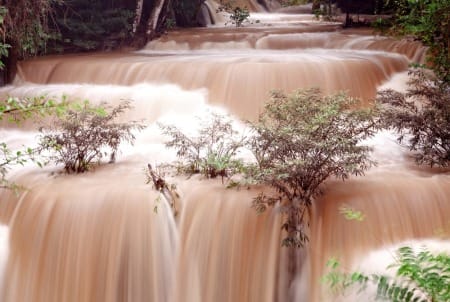
| Waterfalls / Motion Blur | 100-400 | f/11 - f/16 | 1/2 - 2 sec | Creates soft, blurred effect; tripod needed for stability |
Key Components of Manual Camera Settings
To truly master manual camera settings, it’s important to understand the three primary components that affect your exposure: ISO, aperture, and shutter speed. These three settings form the foundation of the "exposure triangle," and each plays a critical role in determining how light or dark your image will appear.
- ISO controls the camera's sensitivity to light. A lower ISO is typically used in bright environments to minimize noise, while a higher ISO is ideal for low-light situations.
- Aperture determines how much light enters the camera lens. A wider aperture (lower f-stop number) allows more light and creates a shallow depth of field, while a narrower aperture (higher f-stop) brings more of the scene into focus.
- Shutter Speed dictates how long the camera sensor is exposed to light. Faster shutter speeds freeze motion, while slower speeds can create blur for dynamic effects.
Learning these settings empowers you to create images with your personal style, turning challenging lighting conditions or fast action into an opportunity rather than a limitation.
2. Setting Up Your Camera for Manual Mode
Switching from Auto to Manual Mode
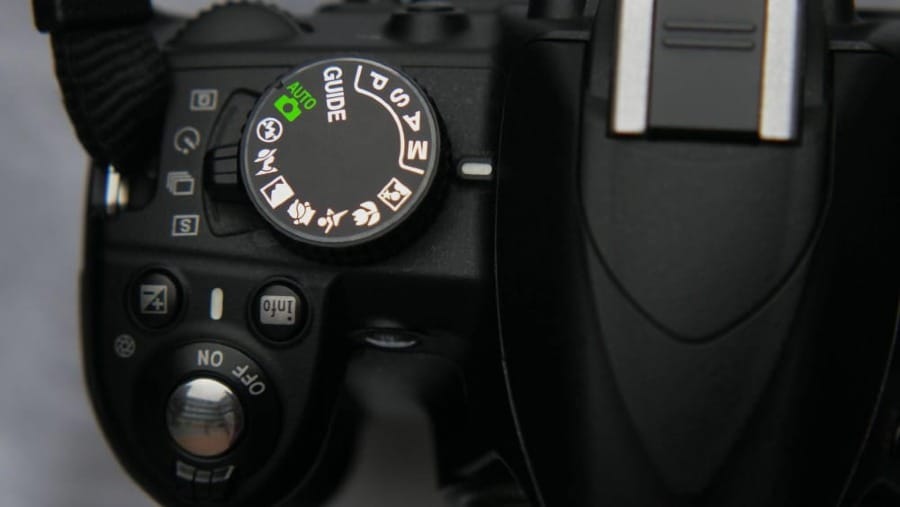
One of the first steps in gaining full creative control over your photography is switching from automatic to manual mode. In most cameras, this can be done by rotating the mode dial, typically marked with an “M” for “Manual.” Switching to manual mode may seem daunting if you’re used to relying on automatic settings, but it’s the gateway to achieving more consistent and personalized results. In this mode, you'll be adjusting each setting—ISO, shutter speed, and aperture—on your own, allowing you to fine-tune each aspect of your photo. By working with manual camera settings, you can learn how to adapt to different lighting conditions and create the exact exposure you envision.
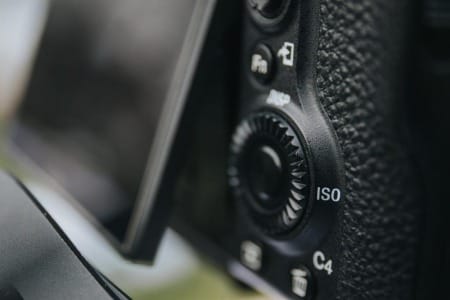
Each camera brand has its own layout, so knowing how to quickly access these settings on your model is essential. Most cameras, whether DSLR or mirrorless, feature dedicated buttons or menu options to adjust each component of manual camera settings directly, and with some practice, this process becomes second nature.
Familiarizing Yourself with the Camera’s Interface
The next step in mastering manual camera settings is to understand your camera’s interface and where each setting is located. Cameras often have an on-screen display, either through a viewfinder or an LCD screen, that shows you the current ISO, aperture, and shutter speed. Familiarizing yourself with this display will make it much easier to keep track of your settings as you shoot.
Many cameras also have shortcut buttons, dials, or touch-screen options for quick adjustments. Understanding these controls allows you to make fast changes while shooting, a crucial skill when conditions shift or you need to capture a fleeting moment. Practice navigating your camera’s interface regularly so you feel confident adjusting settings on the fly.

By setting up your camera for manual operation, you’re laying the groundwork for complete control. Mastering manual camera settings might take time, but the payoff is significant—you’ll have the tools to create precisely the images you envision, regardless of lighting or environmental challenges.
3. ISO: Managing Light Sensitivity
What Is ISO and How Does It Work?
ISO is one of the three core elements of manual camera settings, directly influencing how sensitive your camera’s sensor is to light. In simple terms, ISO determines how much light is needed to produce a properly exposed image. A low ISO value (like 100 or 200) makes the camera less sensitive to light, which is ideal for bright environments or sunny outdoor scenes. A high ISO (such as 1600 or 3200) increases sensitivity, allowing you to capture more detail in dimly lit settings. However, as you increase the ISO, you introduce more “noise” or grain into the image, which can affect overall quality, particularly in larger prints or high-resolution images.
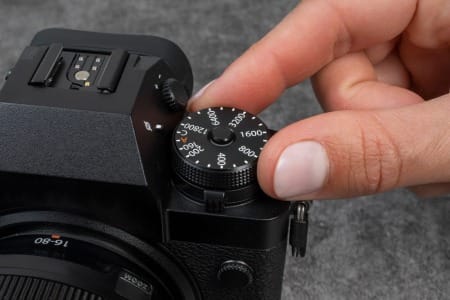
ISO plays a crucial role in achieving a balanced exposure, especially when paired with other manual camera settings like shutter speed and aperture. Adjusting ISO enables you to work in a wide range of lighting conditions, but it’s essential to find the right balance to prevent images from becoming too grainy or underexposed.
Tips for Choosing the Right ISO
Knowing how to select the appropriate ISO for each shot is an essential part of using manual camera settings effectively. As a rule of thumb, use the lowest possible ISO setting for the clearest image quality when adequate light is available. For instance, in outdoor daylight, an ISO of 100 or 200 often yields the best results, minimizing noise while capturing detail.
In low-light situations, such as indoor settings or nighttime scenes, you’ll likely need to increase the ISO to ensure enough light reaches the sensor. However, keep in mind that higher ISO values introduce digital noise, which can impact sharpness and detail. Most modern cameras are equipped with advanced sensors that handle high ISOs well, but it’s still wise to test your camera’s noise tolerance at various ISO levels to understand its limits.
Experimenting with ISO as part of your manual camera settings can help you capture the atmosphere and clarity you’re after. Whether photographing a cityscape at dusk or shooting indoors without flash, adjusting the ISO provides an effective way to balance light and detail in challenging lighting conditions. By mastering ISO alongside shutter speed and aperture, you gain greater flexibility to handle any scenario, ensuring each photo captures the mood you want.
4. Aperture: Controlling Depth of Field
Understanding Aperture and F-Stop Numbers
Aperture is a crucial aspect of manual camera settings, impacting not only how much light enters the lens but also the depth of field in your images. Essentially, aperture refers to the size of the opening in the lens that lets light reach the camera’s sensor. It’s measured in f-stop numbers, with smaller numbers (like f/1.8) indicating a larger opening and larger numbers (like f/16) representing a smaller opening. The aperture size significantly influences the exposure and the portion of the scene that remains in focus, making it a powerful creative tool.
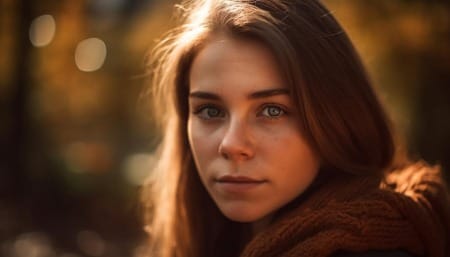
When using a wider aperture (lower f-stop), more light enters, and the depth of field becomes shallow. This effect is ideal for isolating subjects against a blurred background and is perfect for portraits or macro photography where you want to emphasize specific details. A narrower aperture (higher f-stop) reduces the amount of light entering but brings more of the scene into sharp focus, which is excellent for landscapes or architectural photography where detail across the frame is essential.
Choosing the Right Aperture for Your Shot
Selecting the appropriate aperture for each situation is an integral part of working with manual camera settings. For portraits, using a wide aperture, such as f/1.8 or f/2.8, helps to achieve a soft, blurred background (also known as bokeh) that makes the subject stand out. This technique is particularly useful when you want the viewer’s attention drawn directly to the main subject without distractions.
On the other hand, for landscapes or scenes where you want everything to appear sharp, a narrower aperture, like f/8 or f/11, is more effective. This smaller opening allows you to maintain detail in both the foreground and background, creating a more comprehensive focus across the entire frame.
Learning to control aperture through manual camera settings enhances your ability to shape the visual style of each photograph. By mastering aperture adjustments, you can creatively manipulate focus, depth, and clarity in your images, making each shot more compelling and visually impactful.
5. Shutter Speed: Capturing Motion
Shutter Speed Basics
Shutter speed is an essential part of manual camera settings, determining how long your camera’s sensor is exposed to light. Measured in fractions of a second (like 1/500) or whole seconds, shutter speed controls whether motion is frozen or appears blurred in your photo. A fast shutter speed, such as 1/1000 or 1/2000, captures moments instantly, making it ideal for high-speed action, such as sports or wildlife photography, where you want to freeze movement. In contrast, a slow shutter speed, like 1/30 or even several seconds, lets in more light and creates motion blur, which can be used creatively for effects like light trails, soft water, or a sense of motion in a busy street scene.

Shutter speed directly impacts the exposure and sharpness of your image, making it crucial to consider when you’re working with manual camera settings. Choosing the right shutter speed allows you to tailor the mood and motion of the scene, enabling you to capture fast action crisply or convey movement with intentional blur.
Selecting Shutter Speed for Different Scenarios
Choosing the appropriate shutter speed depends on your subject and desired effect. For instance, in sports or wildlife photography, a fast shutter speed, such as 1/1000 or higher, is generally recommended to freeze movement. This setting ensures that even fast-paced action is captured clearly, minimizing motion blur. However, achieving these high shutter speeds might require good lighting or a higher ISO to maintain proper exposure.
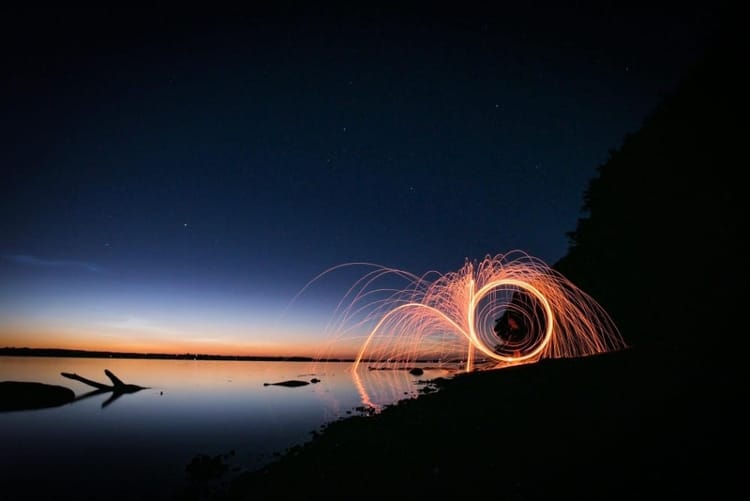
For nighttime photography or creative shots, a slower shutter speed can yield interesting results. Using a tripod, set the camera to a longer exposure time, such as 1 second or more, to capture light trails from moving cars or create a silky effect in flowing water. Be mindful that any small movements will be recorded, so stabilization is key for these long exposures.
Mastering shutter speed within manual camera settings opens up a world of creative possibilities, letting you control the narrative of movement in your photos. Whether you aim to freeze a fleeting moment or convey motion through blur, understanding and adjusting shutter speed allows for dynamic, engaging imagery that tells a story.
6. Balancing the Exposure Triangle
Understanding the Exposure Triangle
The exposure triangle is a fundamental concept in photography that connects the three core elements of manual camera settings: ISO, aperture, and shutter speed. Each of these settings controls light in a unique way, but they must work together to achieve a well-exposed photograph. Think of it as a balancing act—if you adjust one setting, the others need to be adjusted to maintain proper exposure. For instance, increasing ISO to brighten a low-light shot may also increase noise, so you might compensate by adjusting the shutter speed or aperture to reach the desired exposure without compromising quality.
In manual camera settings, mastering the exposure triangle allows you to take full control over not only the brightness of your images but also the style, sharpness, and mood. With a good grasp of how each setting influences the others, you can create photos that are both technically well-exposed and aligned with your creative vision.
Tips for Achieving a Balanced Exposure
To balance the exposure triangle effectively, start by setting your ISO based on the lighting conditions. In bright daylight, a low ISO of 100-200 usually provides the cleanest image quality, while low-light conditions may require a higher ISO to avoid underexposure. Once ISO is set, adjust the aperture based on the depth of field you want—wider for shallow depth (such as f/2.8 for portraits) and narrower for a deeper focus (like f/11 for landscapes). Finally, select the shutter speed to control motion, choosing a faster speed to freeze movement or a slower one to introduce intentional blur.
For example, when photographing a moving subject in dim light, you might set a higher ISO to capture enough light while selecting a fast shutter speed to freeze the action. However, increasing ISO introduces more noise, so if the subject is stationary, you could instead choose a slower shutter speed to let in more light without raising ISO, minimizing noise.
Practicing with manual camera settings and the exposure triangle can help you become comfortable making adjustments intuitively. Experiment by taking a series of shots with different settings to see how they impact the final image. Understanding this balance empowers you to respond to changing lighting conditions and movement in your scenes effectively, ensuring that your images are properly exposed and creatively framed every time. By mastering the exposure triangle, you gain confidence in using manual settings, making your photography more adaptable and expressive across diverse scenarios.
7. Practical Tips for Shooting in Manual Mode
Checking Your Histogram for Exposure Accuracy
One of the most valuable tools for ensuring accurate exposure when using manual camera settings is the histogram. A histogram is a graphical representation of the tonal range in your image, showing the distribution of dark, mid, and bright tones. By examining the histogram after taking a shot, you can determine if your image is properly exposed. For instance, a histogram with data clustered too far to the left indicates underexposure (too dark), while data pushed to the right suggests overexposure (too bright). Learning to interpret this tool can help you make quick adjustments to ISO, shutter speed, or aperture as needed, ensuring that each shot is balanced without relying solely on the camera’s preview screen, which can be misleading in different lighting conditions.
Using Manual Mode for Different Lighting Conditions
One of the greatest advantages of mastering manual camera settings is the ability to adapt to varying lighting conditions, whether you’re shooting in bright sunlight, low indoor light, or during the golden hour. In harsh sunlight, you may want to use a lower ISO and faster shutter speed to avoid overexposure, while in low-light situations, you’ll often need to increase ISO and open up the aperture to allow more light into the sensor. Manual mode gives you the flexibility to adjust settings specifically to match the conditions rather than relying on automatic adjustments that may not provide the best results.
Troubleshooting Common Manual Mode Challenges
While using manual camera settings, you may encounter common issues such as blurry images, excessive noise, or unwanted exposure levels. To prevent blurriness, ensure that your shutter speed is fast enough to capture movement without shaking, or use a tripod for stability in low-light conditions. If noise becomes a problem at high ISO levels, consider using a slower shutter speed or wider aperture to compensate instead of raising ISO. Exposure problems can often be resolved by adjusting the exposure triangle to find the right balance.
By practicing these tips and troubleshooting techniques, you can gain confidence in manual camera settings and quickly make adjustments to capture high-quality images in any setting, enhancing both technical quality and creative expression in your photography.
8. Final Thoughts and Next Steps
Practice and Experimentation
Mastering manual camera settings is a journey that gets easier with practice and experimentation. As you explore ISO, aperture, and shutter speed, you’ll develop an intuitive sense of how each setting impacts your images. Begin by practicing in familiar environments, experimenting with different settings, and observing how they alter the exposure, depth of field, and motion in each shot. Set aside time to shoot in varied lighting conditions, from bright daylight to low light, to understand how to adjust settings on the go. Over time, these adjustments will become second nature, empowering you to capture exactly what you envision.
Recommended Resources for Further Learning
While practicing hands-on is invaluable, additional resources can further accelerate your understanding of manual camera settings. Look for online tutorials, photography books, and video courses that dive deeper into exposure, lighting, and composition. Many photographers also benefit from joining photography groups or workshops where they can learn and share experiences with others working to master manual settings. These resources not only provide technical insights but can also inspire creative approaches to composition and lighting.
Mastering manual camera settings opens endless creative possibilities, transforming how you approach every shot. With practice, patience, and continuous learning, you’ll gain the confidence to fully control each aspect of your photography and bring your unique vision to life.
Thank you for visiting our site and being part of this journey with us! We rely on the generous support of visitors like you to continue providing high-quality. Your donation, no matter the size, helps us maintain the website and create more valuable resources for everyone.

