Introduction
Night street photography is a captivating and unique genre that allows photographers to explore the urban landscape after dark, capturing the city in ways that aren't visible during the day. The allure of shooting at night comes from the dynamic interplay of artificial light, shadows, and the vibrant energy that characterizes city streets. Neon signs, streetlights, car headlights, and illuminated storefronts create a rich palette of light sources, providing endless creative possibilities for photographers willing to explore after sundown.
However, night street photography comes with its own set of challenges. Low light conditions demand specific techniques and gear to achieve sharp, well-exposed images without sacrificing the ambient mood of the scene. Fast lenses, high ISO settings, and sometimes tripods or external flashes become essential tools for balancing exposure in difficult lighting situations. In addition to technical considerations, there is also the challenge of composition, as the scarcity of natural light calls for careful framing to create visually compelling shots.
Despite these challenges, night street photography offers a rewarding opportunity to capture the city's true character, revealing a different side of urban life. With the right approach, photographers can create stunning images that highlight the mystery, mood, and energy that emerge after dark.
1. Essential Gear for Night Street Photography
Camera
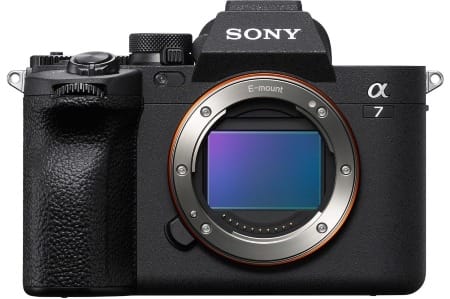
For night street photography, choosing the right camera is crucial. The most important factor is the camera’s low-light performance. Full-frame cameras tend to perform better than APS-C or Micro Four Thirds cameras due to their larger sensors, which gather more light, resulting in cleaner images with less noise. Cameras like the Sony A7 series, Nikon Z series, or Canon EOS R series are popular among night photographers for their excellent high ISO performance. Ideally, you want a camera that allows you to shoot at higher ISO levels (3200 or even 6400) while keeping noise under control.
Lenses
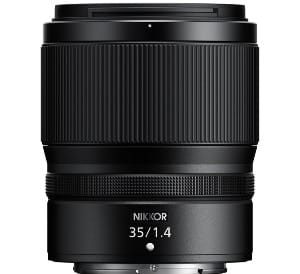
When it comes to lenses, fast primes are highly recommended for night street photography. A wide aperture lens, such as a 35mm f/1.4 or a 50mm f/1.8, will allow you to gather more light, making it easier to shoot in low light without pushing your ISO too high. Fast lenses also provide a shallow depth of field, which can help isolate your subject and create a pleasing bokeh effect with streetlights or neon signs. Wide-angle lenses, such as a 24mm f/1.4, are also great for capturing broader scenes, offering more context and detail in urban environments.
Tripod or Handheld?
Whether to use a tripod or shoot handheld in night street photography depends on your style and subject. While a tripod is useful for long exposures and ensuring tack-sharp images, it can limit mobility and spontaneity—two essential aspects of street photography. If you prefer to shoot handheld, consider using image stabilization features and techniques like bracing your camera against a solid surface to minimize camera shake.
Additional Gear
Carrying extra batteries and memory cards is essential since long exposures and high ISO shooting tend to drain power quickly. External flashes can also be useful for creatively lighting your subject while balancing ambient light sources.
2. Best Camera Settings for Night Street Photography
ISO: Balancing Sensitivity with Noise
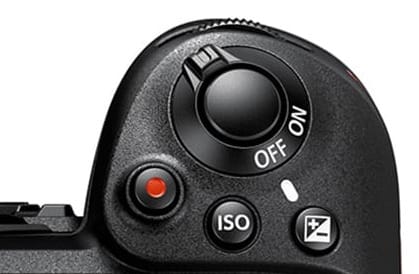
In night street photography, setting the correct ISO is essential for capturing well-exposed images in low light. ISO determines your camera’s sensitivity to light. While a higher ISO helps brighten your image in dark environments, it also increases the risk of noise. In most cases, you’ll need to raise your ISO to 1600, 3200, or even higher to maintain a fast enough shutter speed for handheld shooting. However, it’s important to strike a balance. Modern full-frame cameras handle high ISOs better, but post-processing software like Lightroom or Photoshop can help reduce noise without sacrificing detail.
Shutter Speed: Freezing Motion vs. Capturing Movement
Shutter speed plays a critical role in night street photography, especially when you want to control how movement is captured. A faster shutter speed (around 1/60 to 1/200) helps freeze motion, allowing you to capture sharp images of people, cars, or other moving subjects. On the other hand, if you want to introduce motion blur for artistic effect, such as light trails from passing cars, a slower shutter speed (around 1/10 to several seconds) is ideal. This technique can add dynamism to your night shots, but you may need a tripod or a stable surface to avoid camera shake.
Aperture: Controlling Depth of Field
For night street photography, a wide aperture (f/1.4 to f/2.8) is often the best choice as it lets in more light, helping to keep your ISO lower and your shutter speed faster. A wider aperture also provides a shallow depth of field, which is useful for isolating your subject against a busy, illuminated background. However, for capturing more context, you may want to stop down to f/4 or f/5.6, especially when using a wide-angle lens.
3. Lighting: The Key to Captivating Night Street Shots
Understanding Available Light
In night street photography, the available light is often your only light source. Whether it's streetlights, neon signs, car headlights, or illuminated storefronts, learning how to use these light sources effectively is crucial for capturing mood and atmosphere. Streetlights can create dramatic shadows and highlights, while neon signs offer a vibrant, colorful glow that can add a cinematic quality to your shots. The trick is to avoid overexposed highlights, which can be distracting, and instead use the available light to guide the viewer’s eye through the scene.
Creating Contrast: The Play of Light and Shadow
One of the hallmarks of night street photography is the dramatic contrast between light and shadow. High contrast can add depth and intrigue to your images, making the subject stand out against darker backgrounds. Positioning your subject in areas where the light naturally falls can create striking silhouettes or highlight important details. Balancing the exposure to avoid blowing out highlights while maintaining detail in the shadows is key to achieving a visually compelling image.
Light Trails and Motion Blur
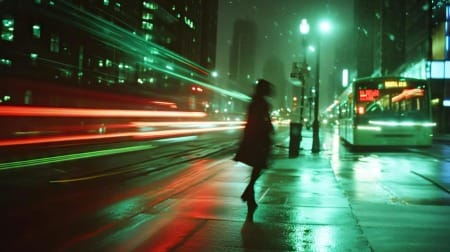
A popular technique in night street photography is capturing light trails or motion blur from moving vehicles. Using a slow shutter speed, you can transform the headlights and taillights of passing cars into glowing streaks of light. This creates a sense of movement and energy in your photos, emphasizing the dynamic nature of the urban environment at night. Panning techniques can also be used to blur backgrounds while keeping your subject sharp, adding an artistic touch to your images.
4. Composition Tips for Night Street Photography
Framing Your Shot
Composition is just as critical in night street photography as it is during the day, but the use of light and shadow becomes even more important. Leading lines, such as roads, railings, or illuminated sidewalks, can help guide the viewer’s eye through the frame and add depth to your image. Reflections from puddles, windows, or shiny surfaces can introduce creative framing opportunities, giving your composition a unique twist. Because light sources like streetlights and neon signs are often your primary visual anchors, positioning them strategically within your frame will help balance the overall composition.
Capturing Candid Moments
Night street photography thrives on spontaneity, and candid moments are a big part of its appeal. Capturing people as they go about their evening routines in the city offers a glimpse into urban life after dark. To do this effectively, it's important to blend into the environment and work discreetly. Shooting with a silent mode (if available on your camera) or using a compact camera can help you go unnoticed. Additionally, the lower light levels can naturally draw attention away from you as a photographer, allowing you to capture genuine expressions and moments without interrupting the scene.
Storytelling Through Your Composition
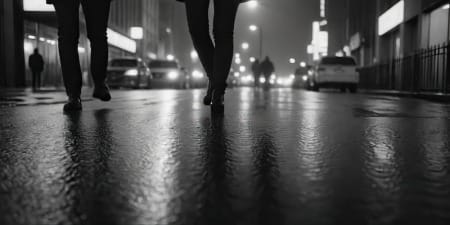
In night street photography, storytelling becomes an essential component of your composition. The contrast between light and dark, as well as the isolation of subjects within the scene, allows for images that evoke mystery, tension, or even tranquility. Including human elements in your frame, such as a lone figure walking through a dimly lit alley or a group of friends under a neon sign, adds emotional depth and scale to the image. These storytelling elements draw the viewer in, encouraging them to explore the narrative of the city at night.
By combining thoughtful framing, attention to candid moments, and strong storytelling elements, your night street photography will convey a compelling sense of place and atmosphere.
5. Overcoming Challenges in Night Street Photography
low-light
Dealing with Low Light
One of the biggest challenges in night street photography is shooting in low-light conditions. When natural light is scarce, relying on artificial light sources like streetlights and neon signs becomes crucial. To overcome this, using fast lenses with wide apertures (f/1.4 to f/2.8) helps gather more light, allowing for faster shutter speeds and lower ISO settings. Raising your ISO is another option, but it’s important to avoid going too high, as this can introduce unwanted noise. In some cases, it might be beneficial to embrace the grain, as it can add a gritty, urban feel to your images, but maintaining a balance between noise and detail is key.
Managing Noise
In night street photography, noise is an inevitable challenge when shooting at higher ISO levels. To manage this, many photographers use post-processing tools like Adobe Lightroom or Photoshop to reduce noise while preserving detail. Techniques such as shooting in RAW format give you more flexibility in post-production, allowing you to pull details from shadows without adding too much noise. Additionally, using a camera with good high-ISO performance—such as full-frame models—can help reduce noise issues even at ISO 3200 or higher.
Focusing in the Dark
Achieving accurate focus in low light is another hurdle in night street photography. Autofocus systems may struggle in dimly lit conditions, especially if there are few high-contrast areas for the camera to lock onto. In these cases, switching to manual focus can give you more control. Using features like focus peaking, if your camera has it, or pre-focusing on a specific distance can help ensure sharp images. Another technique is to focus on well-lit areas first and then recompose your shot, ensuring the subject is in focus even if the surrounding environment is dark.
By mastering these techniques, you can overcome the challenges of low light, noise, and focusing and elevate your night street photography to a higher level of technical and artistic excellence.
6. Post-Processing Tips for Night Street Photography
Editing for Impact
Post-processing plays a significant role in bringing out the best in your night street photography. One of the first things to adjust is the contrast. Since night shots often have deep shadows and bright highlights, increasing contrast can add drama and depth to your images. Be mindful, though, not to push the highlights too far, as this could blow out important details in light sources like streetlights and neon signs. Similarly, lifting the shadows slightly can help reveal hidden details while preserving the moody atmosphere typical of night photography.
Noise Reduction
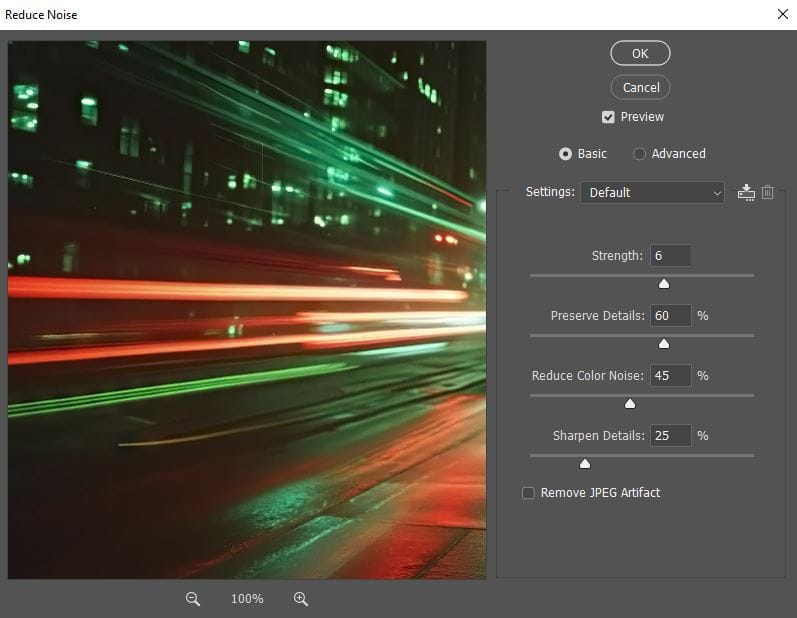
In night street photography, noise is often introduced due to high ISO settings. Post-processing software like Adobe Lightroom or Photoshop offers effective noise reduction tools. Start by applying moderate noise reduction to balance between reducing grain and maintaining important details in your image. Be careful not to overdo it, as too much noise reduction can result in a loss of texture and sharpness. A good approach is to selectively apply noise reduction only to shadow areas, where noise tends to be most visible, while keeping other parts of the image untouched.
Color Grading and Sharpening
Color grading is an essential part of the post-processing workflow in night street photography. You can enhance the mood of your shot by tweaking the colors. For example, emphasizing cooler tones (blues and purples) can evoke a sense of calm or mystery, while boosting warmer tones (oranges and reds) can make the image feel vibrant and energetic. Finally, apply sharpening carefully to restore some of the details lost in noise reduction, ensuring your image remains crisp without becoming overly harsh.
With these post-processing techniques, your night street photography can achieve a polished, professional look while retaining the unique atmosphere of the nighttime cityscape.
7. Safety and Etiquette in Night Street Photography
Staying Safe
While night street photography can yield stunning images, it's important to prioritize your safety. Cities can look different after dark, and certain areas may be less populated or more dangerous at night. Stick to well-lit, busy areas where you can remain aware of your surroundings. If possible, bring a friend along, not only for the company but also for added security. Keep your gear minimal and discreet—using a compact camera or mirrorless setup can draw less attention compared to larger DSLR kits. Additionally, consider carrying your camera strap in a cross-body style to prevent easy snatch-and-grab theft.
Respecting Privacy and Laws
When practicing night street photography, it's essential to respect both people's privacy and local laws. In many places, photographing in public spaces is legal, but people may still feel uncomfortable being photographed, especially in close proximity. If you are photographing someone directly, be respectful of their space, and if they express discomfort, it's best to move on. It’s also a good idea to familiarize yourself with local laws regarding street photography, as some areas may have restrictions, especially regarding photographing private property or sensitive locations.
Cultural and Social Sensitivity
Beyond legal considerations, practicing good etiquette in night street photography means being sensitive to the people and environments you're photographing. Respect local customs and be mindful of your subjects, especially in situations where people may be more vulnerable or unaware of being photographed.
By following these safety and etiquette guidelines, you can enjoy the exciting world of night street photography while maintaining respect for your surroundings and the people within them.
Conclusion
Night street photography is a rewarding yet challenging genre that pushes photographers to adapt to low light conditions, capture spontaneous moments, and embrace the artistic possibilities that come with shooting after dark. The interplay of artificial light, shadows, and dynamic urban environments offers a rich canvas for creative expression. While mastering technical aspects like camera settings, composition, and post-processing is essential, equally important is the ability to move through the city safely and respectfully.
With the right gear, thoughtful preparation, and a bit of creativity, photographers can produce striking images that capture the unique atmosphere and energy of the night. As you continue to experiment with different techniques and approaches, you'll find that night street photography not only enhances your technical skills but also opens up new ways to tell compelling visual stories. Don’t hesitate to explore and develop your own style in this captivating genre.


