Introduction
Automotive photography is a unique blend of technical skill and creativity, where the goal is to capture the essence, power, and elegance of vehicles through the lens. Whether you're photographing vintage classics, sleek modern cars, or rugged off-road trucks, the way you capture these machines can make all the difference in how they're perceived. Good automotive photography goes beyond simply snapping a photo; it’s about storytelling, bringing out the personality and detail that makes each vehicle unique.
For those new to this genre, it can be a bit daunting to know where to start. Even seasoned photographers find themselves facing unique challenges specific to automotive photography, such as dealing with reflective surfaces, managing harsh outdoor lighting, and finding the best angles to showcase the car’s design. This guide will walk you through some of the essential automotive photography tips, covering everything from choosing the right location to refining your images in post-processing. With these tips, you’ll be equipped to capture stunning car images that truly stand out.
Affiliate Disclaimer
This blog post may include links to affiliate sites. If you click on an affiliate link and make a purchase, we may earn a small commission or receive other compensation at no extra cost to you. Please note that many of the links on our site are affiliate links. Our use of these links does not impact the products, services, or websites we recommend to you. This disclaimer covers all forms of communication with you, including our website, email, phone, social media, products, and other platforms.
1. Choose the Right Location
Selecting the right location is one of the most essential aspects of capturing stunning automotive photos. The backdrop can either enhance the vehicle’s appearance, highlighting its unique design and style or distract from it, diminishing the visual impact of the image. By carefully choosing the setting, you can create a balanced composition that puts the car at the forefront.
What Makes a Good Location?
An ideal location complements the car’s aesthetics without competing for attention. For example, urban settings like parking garages, bridges, or industrial areas often work well for modern cars, adding a sense of edginess. On the other hand, a scenic mountain pass or open road might be perfect for capturing rugged vehicles or classic cars, giving them a sense of freedom and timeless appeal.
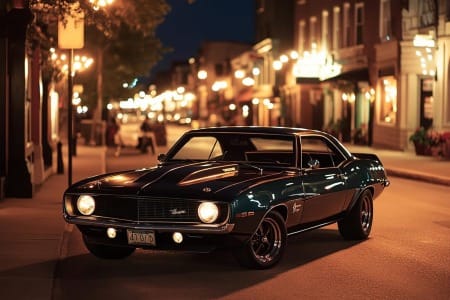
One of the best automotive photography tips is to avoid overly crowded areas with excessive background details. Too many elements can shift the viewer’s focus away from the car, so look for simple, clean backdrops that allow the vehicle to stand out. Additionally, consider the lighting conditions in the chosen location, as open fields or large reflective buildings may cause unwanted glare.
Tips for Finding Unique Backdrops
Finding the right location requires a mix of creativity and planning. Scout areas in advance or explore places like deserted roads, remote beaches, or even modern architectural sites. Many photographers use online tools like Google Earth or Instagram location tags to find inspiration and pre-select locations that might fit their vision.
If you’re shooting in an urban environment, timing can be crucial. Early mornings or late evenings often mean less traffic and fewer pedestrians, allowing you more freedom to position the car and compose shots without interruptions. Ultimately, selecting a thoughtful backdrop will elevate your automotive photography and make each shot more compelling.

2. Master Lighting Techniques
Lighting is one of the most powerful tools in automotive photography, and mastering it can make the difference between a dull photo and a captivating one. Understanding how to use both natural and artificial light allows you to highlight the car's contours, textures, and reflective surfaces, enhancing its overall appeal. Proper lighting not only improves the look of the vehicle but also helps convey a specific mood or atmosphere, making it a crucial part of effective automotive photography.
Natural vs. Artificial Lighting
When working with natural light, timing plays a huge role. The golden hours—around sunrise and sunset—are ideal because the soft, warm light during these times minimizes harsh shadows and reduces reflections on the car's surface. Natural lighting also adds depth to the scene, emphasizing the car's shape and lines. Shooting in direct midday sunlight, however, can be challenging as it often creates strong shadows and intense highlights, making the car look flat or overexposed.
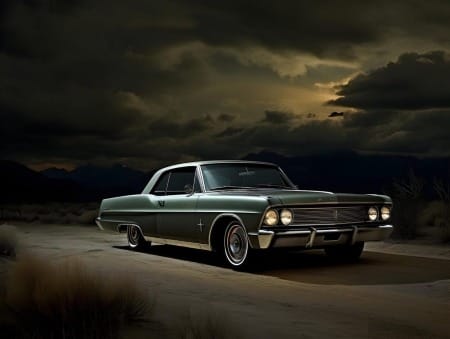
Artificial lighting, such as LED panels or portable strobes, provides more control and consistency, especially in low-light settings or indoor environments. With artificial lights, you can adjust brightness and angle to create specific effects and add dimension to the shot. For instance, low-angle lighting can add drama, while soft diffused light highlights intricate details without creating harsh reflections. One of the most effective automotive photography tips is to experiment with both light sources to achieve a dynamic look.
Golden Hour Advantage
The golden hour offers a soft, flattering light that adds warmth and depth to automotive photos. During this time, shadows are longer and less intense, which can make the vehicle appear more three-dimensional. For photographers seeking to add a touch of magic and timelessness to their car images, capturing shots during golden hour is one of the most popular and recommended automotive photography tips. By understanding and utilizing these lighting techniques, you’ll be well-equipped to capture professional-quality images that truly stand out.
3. Experiment with Angles and Perspectives
The angle from which you shoot a car can dramatically influence how it’s perceived, making it essential to explore different perspectives to find the most flattering and dynamic view. Cars, with their sleek lines and unique shapes, offer a wealth of creative opportunities for photographers. By trying a range of angles, you can highlight different features, add a sense of movement, or emphasize the car’s power and style. Exploring angles is one of the most recommended automotive photography tips for achieving compelling and eye-catching results.
High vs. Low Angles
Choosing between a high or low angle can create entirely different looks. Shooting from a low angle often gives the car a powerful, imposing presence, as it exaggerates the height and makes the vehicle seem larger and more dominant. This technique works particularly well for sports cars, trucks, and SUVs where you want to emphasize strength or speed. Conversely, a high angle, like shooting from a ladder or an elevated surface, can provide a comprehensive view of the car’s design, capturing details like the roofline or interior layout. High angles are ideal for showing the car in its entirety, providing context, and revealing features that may be overlooked from eye level.
Creative Angle Tips for Car Photography
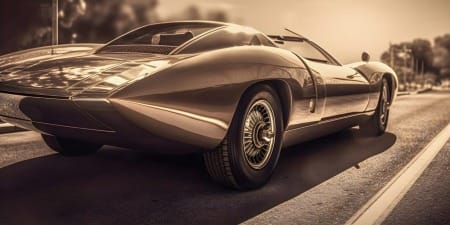
One of the best automotive photography tips for adding visual interest is to experiment with unconventional angles. For instance, shooting from a 3/4 angle, which captures part of the front and side of the car, is a popular perspective as it reveals depth, making the car appear more three-dimensional. Another effective angle is capturing reflections on the car’s surface, which can add an artistic flair to the image. Additionally, shooting through objects, such as trees, windows, or fences, can add a sense of depth and frame the vehicle naturally.
Don’t be afraid to move around the car, crouch down, or climb higher for an unusual shot. By applying these automotive photography tips, you can find angles that showcase the vehicle’s personality, highlight its design features, and create photos that are both striking and memorable.
4. Focus on the Car's Key Features
One of the most powerful ways to make automotive photography captivating is to emphasize the vehicle’s defining features. Every car has unique elements that make it stand out, whether it’s the distinctive grille, sleek headlights, aggressive lines, or elegant curves. By focusing on these features, you can create images that tell a story about the car’s personality and craftsmanship. Among essential automotive photography tips, isolating and highlighting these signature details can greatly enhance the impact of your shots.
Highlighting Unique Design Elements
Every car model has details that set it apart, and capturing these can add depth and interest to your photos. Start by identifying features that represent the car’s style—like the curvature of the hood, the texture of the tires, or the emblem that represents its brand. For luxury cars, close-up shots of the interior, such as the stitching on leather seats or the dashboard’s refined design, can evoke a sense of sophistication. Meanwhile, focusing on elements like the tires or the front grille can bring out the rugged personality of off-road vehicles. By isolating these details, you make the car’s unique characteristics the centerpiece of the image.
Using Close-Ups for Impact
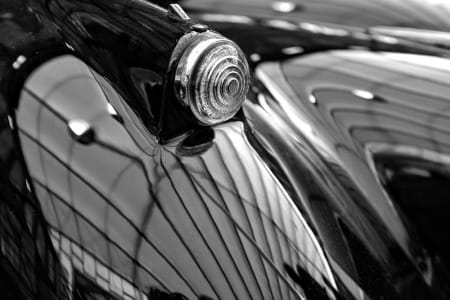
Close-up shots are another excellent way to create a powerful impression by focusing on individual components of the car. By getting close, you can highlight textures, reflections, and even slight imperfections, which adds a layer of realism to the image. One of the best automotive photography tips for achieving dramatic close-ups is to use a wide aperture (like f/2.8 or lower) to blur the background slightly, which isolates the feature in sharp focus. This technique creates a sense of depth and draws the viewer’s eye directly to the key feature you want to emphasize.
Whether it’s the fine details of the headlights or the sleek lines running along the car’s body, focusing on key features helps tell the car’s story visually. By integrating these automotive photography tips, you can create images that reveal a vehicle's distinctive style and craftsmanship, adding character and depth to your automotive portfolio.
5. Use Reflections Wisely
Reflections are a double-edged sword in automotive photography. They can either add an artistic touch to your image or create distractions that take attention away from the car. Because cars have glossy, reflective surfaces, managing reflections is essential for clean, professional-looking photos. By understanding how to work with reflections, you can use them to enhance the shot rather than hinder it. Among popular automotive photography tips, mastering reflection control ranks high for achieving sharp, polished results.
Controlling Reflections on the Car's Surface
One of the first challenges in automotive photography is dealing with unwanted reflections, especially in outdoor or brightly lit environments. Reflections from buildings, trees, and even yourself can show up on the car’s surface, often detracting from its design. To minimize this, position yourself and the car strategically. For instance, shooting from a low angle can reduce reflections from the sky or surrounding elements. Another effective tip is to use a polarizing filter, which helps cut down on reflections and glare, enhancing the car’s true colors and shine. Adjust the filter to find the best balance of reflection reduction without compromising the quality of the light.
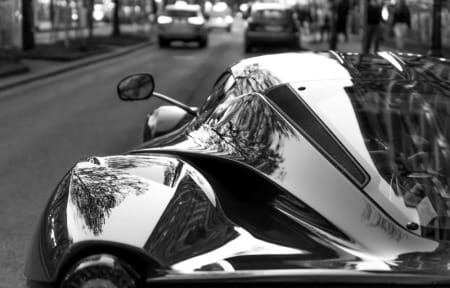
Utilizing Reflections for Artistic Shots
On the flip side, reflections can also be used creatively to add depth and interest to your photos. For instance, reflections on a car’s hood or windshield can mirror the environment, blending the car with its surroundings in a visually striking way. Among artistic automotive photography tips, using puddles or reflective surfaces like glass walls is highly recommended. Position the car so that its reflection appears in the water or mirrored surface, creating a double image effect that adds depth and creativity.
Experimenting with reflections allows you to highlight the car’s shape while playing with the surrounding environment to tell a unique visual story. By incorporating these automotive photography tips on reflections, you’ll be able to create balanced, visually compelling images that highlight the car’s beauty without unwanted distractions.
6. Capture the Car in Motion
Capturing a car in motion can transform a static image into a dynamic one, conveying speed, power, and excitement. Motion shots add an extra layer of energy to your automotive photography, bringing the vehicle to life and allowing viewers to imagine it on the open road. While these shots can be challenging, they are incredibly rewarding and are among the most popular automotive photography tips for creating striking images that stand out.
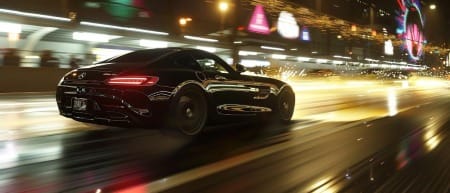
Panning Techniques for Dynamic Shots
One of the most effective methods for capturing motion is panning, a technique where you move your camera along with the moving car to keep it in focus while blurring the background. This effect creates a sense of speed and fluidity, emphasizing the car’s motion against a dynamic, streaked background. To execute this technique, set a slower shutter speed—typically between 1/30 and 1/60 of a second—and move the camera smoothly in sync with the vehicle. It may take a few tries to perfect, but with practice, panning becomes a powerful tool in your automotive photography arsenal. Mastering this technique is among the essential automotive photography tips for achieving professional motion shots.
Shutter Speed and Motion Blur Effects
Adjusting shutter speed is another way to introduce motion into your shots. For instance, a slow shutter speed will blur the car slightly while emphasizing its path, creating a sense of speed. If you prefer to keep the car sharp while blurring the background, use a moderate shutter speed, which still conveys motion without losing detail. Conversely, a faster shutter speed (1/500 or faster) can freeze the car’s movement entirely, making it appear as though it’s frozen in action.
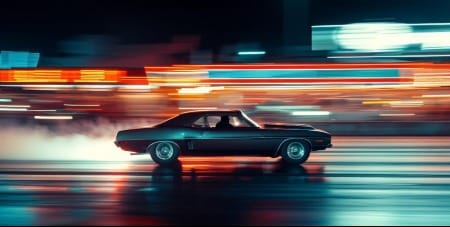
Experimenting with shutter speed and motion blur allows you to create a variety of dynamic effects that emphasize the car’s speed and power. Following these automotive photography tips on motion shots will give your photos a cinematic quality, capturing the thrill of the drive and bringing your images to life. Whether you’re photographing sports cars on the track or everyday vehicles on the road, mastering motion shots can elevate your automotive photography portfolio.
7. Adjust Camera Settings for Optimal Results
Achieving sharp, high-quality images in automotive photography requires a solid understanding of camera settings. Knowing how to adjust ISO, aperture, and shutter speed will allow you to capture each shot with precision, enhancing the car’s details, colors, and overall impact. By fine-tuning these settings, you’ll have greater control over exposure, depth of field, and motion, which are all essential for capturing stunning automotive shots. One of the most important automotive photography tips is to learn and experiment with these settings to suit various lighting and environmental conditions.
ISO, Aperture, and Shutter Speed Basics
Each setting plays a critical role in achieving a balanced shot. ISO controls the camera’s sensitivity to light—keeping it as low as possible (e.g., ISO 100) ensures minimal grain and maximum clarity. Higher ISO values can be useful in low-light conditions, but too much can introduce noise, which can detract from the car’s sharp details.
The aperture, which controls the depth of field, is another vital setting. For full car shots, a mid-range aperture (like f/8 to f/11) is often ideal, as it keeps the entire vehicle in focus while maintaining background clarity. When focusing on specific details or close-ups, a wider aperture (e.g., f/2.8 or f/4) helps isolate the subject by creating a blurred background.
Recommended Settings for Automotive Photography
To capture cars in motion, use a faster shutter speed (e.g., 1/500 or higher) to freeze action or a slower one (e.g., 1/30) for panning shots that convey motion. For static shots, you can opt for lower shutter speeds if using a tripod, which allows for maximum detail without a camera shake. Additionally, many automotive photography tips suggest experimenting with the “golden hour” for balanced lighting and vibrant colors, as this time of day provides naturally flattering light.
Mastering these camera settings will enable you to adapt to diverse situations, capturing sharp, vibrant images that bring out the car’s beauty and personality. By applying these automotive photography tips, you’ll be prepared to handle various lighting and movement scenarios, ensuring consistent, high-quality results in your automotive photography work.
8. Focus on Composition and Framing
Composition and framing are essential elements in creating visually compelling automotive photographs. A well-composed image directs the viewer’s eye to the car, highlights its design, and brings balance to the shot. Understanding techniques such as the rule of thirds, leading lines, and symmetry can elevate your images from simple car shots to artful portrayals of vehicles. Applying thoughtful composition is among the top automotive photography tips for producing images that are both balanced and engaging.
Rule of Thirds in Automotive Photography
The rule of thirds is a fundamental composition guideline that involves dividing the frame into a 3x3 grid and positioning the car along one of the lines or at an intersection point. This approach creates a more dynamic composition, drawing the viewer’s eye naturally to the car without placing it directly in the center. For example, placing the car slightly off-center with a scenic background can give the image a sense of depth and balance. This rule is especially useful for environmental shots where you want to incorporate the surroundings without overshadowing the car itself.
Leading Lines and Symmetry
Incorporating leading lines is another effective technique to enhance your automotive compositions. Roads, fences, or architectural elements can serve as lines that guide the viewer’s eye directly toward the car, creating a focal point. Leading lines not only add depth but also create a sense of motion, making them particularly useful for automotive photography.
Symmetry is another powerful compositional tool, especially when photographing the car from the front or rear. Centering the vehicle and ensuring that both sides of the frame are balanced adds a sense of stability and precision. For luxury or sports cars, symmetrical framing emphasizes the car’s aesthetic and design.
Applying these automotive photography tips on composition and framing will allow you to create well-balanced, professional images that showcase the car in an artful way. By experimenting with the rule of thirds, leading lines, and symmetry, you’ll develop a unique style that highlights each car’s character, capturing the viewer’s attention with thoughtful, dynamic compositions.
9. Pay Attention to Background Details
The background plays a crucial role in automotive photography, often influencing the overall mood, focus, and impact of the shot. A well-chosen background can elevate a photo, complementing the car’s design and making it stand out. Conversely, a cluttered or distracting background can pull attention away from the car, diminishing the shot’s effectiveness. Among the top automotive photography tips, carefully selecting or controlling the background is key to creating clean, focused images that highlight the vehicle.
Avoiding Background Distractions
When choosing a background, aim for simplicity. Busy or cluttered backgrounds can easily divert the viewer’s focus from the car itself, which should always be the main subject. Look for locations that offer a neutral or complementary setting, such as an open field, a deserted road, or an industrial backdrop with minimal elements. If distractions like poles, pedestrians, or other vehicles are unavoidable, repositioning the car or changing your angle can often resolve the issue. Many automotive photographers also recommend using a shallow depth of field (wide aperture) to blur the background slightly, keeping it visually unobtrusive while focusing on the car.
Choosing Backgrounds That Complement the Car
Selecting a background that enhances the car’s character and style is one of the most valuable automotive photography tips. For example, a luxury sedan might look best against a modern architectural background that emphasizes sophistication, while a rugged off-road vehicle could be perfectly suited to a mountain or desert setting. When photographing classic cars, consider vintage or historical backgrounds that echo the vehicle’s era, adding to the overall atmosphere of the image.
The relationship between the car and its environment can set the tone for the photo, whether it’s elegance, power, adventure, or nostalgia. By paying close attention to background details, you’ll ensure that each image is not only visually pleasing but also consistent in style, allowing the car to remain the focal point. These automotive photography tips on background selection and control will help you create more intentional, compelling compositions that enhance the overall quality of your automotive shots.
10. Post-Processing for Polished Results
Post-processing is an essential step in automotive photography, allowing you to enhance the image, correct any imperfections, and bring out the car’s details for a professional finish. With the right editing techniques, you can adjust lighting, color balance, and contrast to create images that truly stand out. Applying post-processing techniques thoughtfully is among the most recommended automotive photography tips, as it can significantly elevate the final result while maintaining a realistic look.
Basic Editing Tips for Automotive Photos
Start with essential adjustments to optimize exposure, contrast, and color. Often, car photos can benefit from slight tweaks in exposure to ensure all parts of the vehicle are well-lit without overexposing certain areas. Contrast adjustments are useful for adding depth and making the car's shape and details more defined, while slight color enhancements can make the vehicle's paint pop against the background. A common automotive photography tip is to pay particular attention to the car's highlights and shadows, as balanced lighting can bring out the car’s contours without creating harsh, unnatural edges.
Using software like Adobe Lightroom or Capture One, you can also apply minor corrections to areas with unwanted reflections or minor imperfections. Cloning tools or selective adjustment brushes can be helpful for removing distractions without altering the car’s natural look.
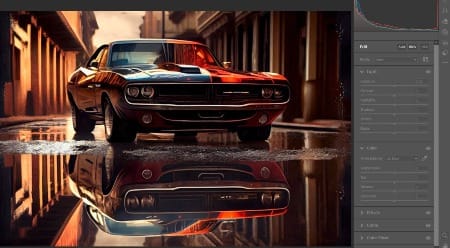
Advanced Editing Techniques
For a more polished, professional result, experiment with advanced editing techniques such as color grading, background adjustments, and selective sharpening. Color grading lets you create a specific mood or tone for the photo, enhancing the environment while keeping the car's colors true to life. Adjusting the background selectively can help emphasize the car by reducing distractions or desaturating colors slightly, creating a pleasing contrast between the vehicle and its surroundings.
Lastly, selective sharpening can be applied to key features like the grille, headlights, and tires, making these details pop without oversharpening the entire image. By following these automotive photography tips in post-processing, you’ll be able to create polished images that capture the essence of each vehicle, giving your photos a professional and captivating finish.
Conclusion
Mastering automotive photography requires attention to detail, creativity, and a solid understanding of both technical and artistic elements. By applying these automotive photography tips, you’ll be better equipped to capture the unique beauty, power, and personality of each vehicle, whether it’s a luxury sedan, a rugged off-roader, or a vintage classic. From selecting the right location and lighting to experimenting with angles, refining camera settings, and post-processing, each tip contributes to creating a striking, high-quality image.
Remember that practice and experimentation are key to honing your skills. Don’t be afraid to try different perspectives, play with motion techniques, or explore new post-processing styles to find what works best for you. With time, you’ll develop a personal style that resonates in your work, allowing you to tell compelling stories through each car image.
Ultimately, automotive photography is about capturing not just a vehicle but an experience and a mood. By following these tips and making each shot intentional, you’ll elevate your automotive photography, creating images that not only impress but also inspire and engage viewers.


