Top Interior Photography Techniques for Perfect Shots
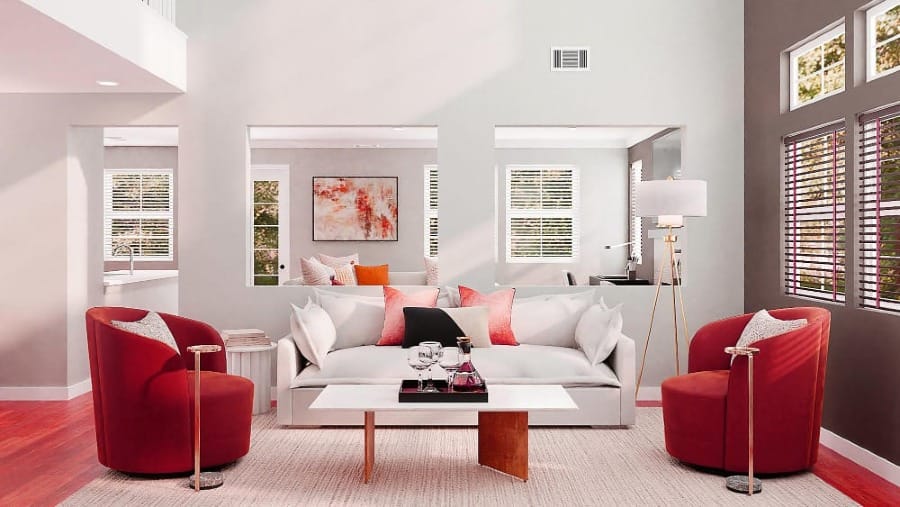
1. Understanding the Basics of Interior Photography
1.1 What is Interior Photography?
Interior photography is a specialized genre of photography that focuses on capturing the aesthetic and functional aspects of interior spaces. It encompasses everything from residential homes to commercial spaces like hotels, restaurants, and offices. The goal is to showcase the design, layout, and ambiance of a space through visually compelling images. Whether for real estate, interior design portfolios, or lifestyle publications, mastering the art of interior photography is essential for presenting interiors in the best possible light.
1.2 Importance of Proper Lighting and Composition
Lighting and composition are the cornerstones of high-quality interior photography. Proper lighting can highlight textures, define spaces, and set the mood, while a well-thought-out composition ensures that the viewer's attention is directed to the most important elements of the room. These two aspects work together to create images that not only look professional but also tell a story about the space. For example, soft natural light can evoke a cozy and inviting atmosphere, whereas sharp, directional lighting might highlight modern and sleek interiors.
1.3 Key Challenges in Interior Photography
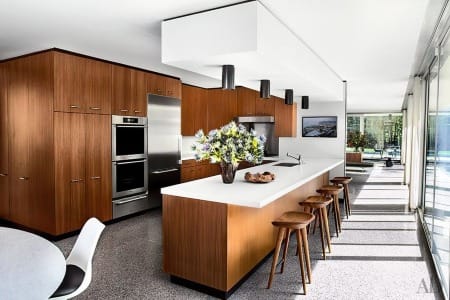
Interior photography comes with its own set of challenges. One common issue is managing diverse lighting sources, such as a mix of natural and artificial light, which can result in inconsistent color tones. Another challenge is finding the right angles to make a space look expansive and well-balanced. Clutter, reflections, and awkward furniture placements can also complicate the process. Overcoming these hurdles requires a combination of technical skill, creativity, and patience. Understanding the basics of interior photography and practicing regularly can help photographers effectively navigate these challenges while creating stunning images.
Affiliate Disclaimer
This blog post may include links to affiliate sites. If you click on an affiliate link and make a purchase, we may earn a small commission or receive other compensation at no extra cost to you. Please note that many of the links on our site are affiliate links. Our use of these links does not impact the products, services, or websites we recommend to you. This disclaimer covers all forms of communication with you, including our website, email, phone, social media, products, and other platforms.
2. Mastering Lighting Techniques
2.1 Utilizing Natural Light to Enhance Interiors
Natural light is a key element in interior photography, as it provides a soft and natural look that complements most interior spaces. Shooting during the day, when sunlight filters through windows, can create warm and inviting images. Pay attention to the direction and intensity of the light. Soft morning or late afternoon light is ideal, as it avoids harsh shadows and creates a balanced exposure. To make the most of natural light, open curtains or blinds and use sheer drapes to diffuse the light for an even glow. Strategically positioning furniture or decorative elements in the path of natural light can also add dimension and depth to your photographs.

2.2 Balancing Natural and Artificial Lighting
In many cases, relying solely on natural light isn’t feasible, especially in rooms with limited windows or during nighttime shoots. Interior photography often requires a balance between natural and artificial lighting to achieve a consistent and cohesive look. Artificial lighting, such as overhead lights, lamps, or wall sconces, can fill in shadows and highlight specific features of a room. When combining light sources, pay attention to the color temperature of each light. Mixing cool and warm tones can result in unappealing color casts. Use white balance settings on your camera to harmonize the lighting and maintain an accurate representation of the space.
2.3 Using Light Modifiers for Professional Results
For photographers seeking a polished and professional look in their interior photography, light modifiers can be invaluable tools. Reflectors help bounce light into darker corners, ensuring that no area of the room is underexposed. Diffusers soften harsh light, reducing sharp shadows and creating a natural, even illumination. Additionally, external flash units or continuous lights can be directed and modified to emulate natural light or add drama to specific areas of the space. Mastering the use of light modifiers allows photographers to gain complete control over lighting, even in challenging environments.
Understanding and applying these lighting techniques can dramatically improve your interior photography results. By blending natural and artificial lighting and incorporating light modifiers, you can create vibrant, well-lit images that showcase every detail and mood of the interior space.
3. Perfecting Composition in Interior Photography
3.1 The Rule of Thirds and Leading Lines
Composition is a critical aspect of interior photography that determines how visually appealing and engaging your images are. The rule of thirds is a classic composition technique that helps create balance and draw the viewer’s eye to key elements in a scene. To apply this rule, imagine a grid dividing the frame into nine equal sections. Position important features, like a statement piece of furniture or architectural detail, along these lines or at their intersections. This approach adds structure and harmony to your photos.
Leading lines are another powerful compositional tool, guiding the viewer’s eye through the image. In interior spaces, these lines might include the edges of a table, a staircase railing, or even light fixtures. By emphasizing these lines, you can create depth and perspective, making the space feel dynamic and well-organized.
3.2 Creating Depth with Foreground and Background Elements
One of the challenges in interior photography is avoiding flat or lifeless images. Incorporating foreground and background elements can add depth and dimension, making your photos more engaging. For instance, placing a decorative object, such as a vase or a chair, in the foreground while showcasing the overall room in the background creates a sense of layering.
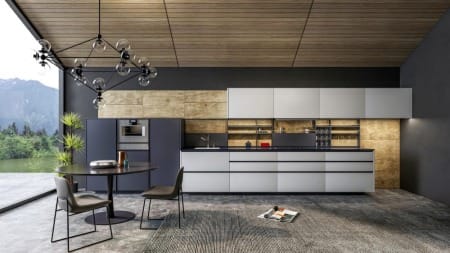
This technique is particularly effective in larger spaces, where it’s essential to highlight both the individual features and the room’s overall flow. Experiment with different angles and positions to ensure that these layers interact harmoniously, enhancing the visual narrative of the space.
3.3 Styling the Space for Photographic Appeal
Styling plays a vital role in interior photography, as it ensures the space looks polished and inviting. Before shooting, declutter the room to remove any distractions or personal items that could detract from the composition. Pay attention to details such as the alignment of furniture, the placement of décor, and the flow of textiles like curtains or rugs.
Consider adding props to create a live-in feel. A cozy blanket draped over a sofa or a set table can add warmth and personality to the scene. However, it’s essential not to overdo it—minimalism often works best in interior photography, allowing the architectural and design elements to shine.
Composition is about more than technical rules; it’s an opportunity to tell a story about the space. By applying techniques like the rule of thirds, incorporating depth, and carefully styling the area, you can elevate your interior photography and create images that resonate with viewers. These compositional strategies help capture the essence of a room while showcasing its unique features and atmosphere.
4. Choosing the Right Gear for Interior Photography
4.1 Must-Have Lenses for Capturing Interiors
The right lens can make all the difference in interior photography, where capturing the full essence of a space is crucial. Wide-angle lenses are a top choice for most interior photographers. These lenses allow you to fit more of the room into the frame, making even small spaces appear larger and more inviting. A lens with a focal length of 16-35mm on a full-frame camera or 10-20mm on a crop sensor camera is ideal for this purpose. However, be cautious not to overuse extremely wide angles, as they can distort the proportions of a space.
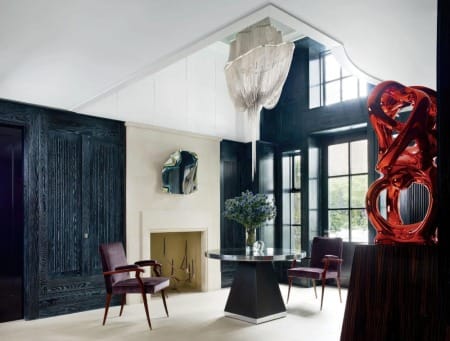
Prime lenses, especially those with low aperture values (e.g., f/1.8 or f/2.8), are also valuable for capturing detailed shots of décor and architectural features. Their ability to create a shallow depth of field allows you to isolate subjects and add a professional touch to your photos.
| Brand | Lens Model | Focal Length | Maximum Aperture | Mount Type |
|---|---|---|---|---|
| Nikon | NIKKOR Z 14-30mm f/4 S Lens | 14-30mm | f/4 | Nikon Z |
| Nikon | AF-S NIKKOR 14-24mm f/2.8G ED Lens | 14-24mm | f/2.8 | Nikon F |
| Sony | FE 16-35mm f/2.8 GM Lens | 16-35mm | f/2.8 | Sony E |
| Sony | FE 12-24mm f/4 G Lens | 12-24mm | f/4 | Sony E |
| Sony | FE 24mm f/1.4 GM Lens | 24mm | f/1.4 | Sony E |
| Canon | EF 16-35mm f/2.8L III USM Lens | 16-35mm | f/2.8 | Canon EF |
| Canon | RF 15-35mm f/2.8L IS USM Lens | 15-35mm | f/2.8 | Canon RF |
4.2 Benefits of Tripods and Stabilizers
A tripod is an essential tool in interior photography, particularly when shooting in low light or using slower shutter speeds to capture sharp, well-exposed images. Tripods provide stability, ensuring that your photos remain crisp and free of motion blur. Additionally, they allow you to maintain consistent framing when shooting multiple exposures for HDR (high dynamic range) images—a technique often used in interior photography to balance highlights and shadows.
Stabilizers, such as gimbals or camera cages, are particularly helpful for photographers who also shoot video. These tools enable smooth camera movements, creating professional-looking videos that showcase interiors in a dynamic way.
4.3 Camera Settings for Interior Photography
Adjusting your camera settings appropriately is key to achieving high-quality results in interior photography. Start with a low ISO setting, typically between 100 and 400, to minimize noise and maintain image clarity. Pair this with a slow shutter speed, especially when using a tripod, to let in enough light for a properly exposed photo.
Aperture settings will depend on the scene. For wide room shots, use a smaller aperture (higher f-number) like f/8 or f/11 to ensure everything is in focus. For detail shots, a wider aperture (lower f-number) can help emphasize specific elements by creating a shallow depth of field.
Investing in the right gear, from lenses to tripods, and mastering camera settings can significantly elevate your interior photography. The combination of proper equipment and thoughtful technique ensures that you can showcase interiors in a way that captures their true beauty and functionality.
5. Post-Processing to Enhance Interior Photos
5.1 Editing Software Recommendations
Post-processing is a crucial step in interior photography, as it allows you to refine your images and highlight the best features of a space. To start, invest in professional editing software like Adobe Lightroom and Photoshop. Lightroom is perfect for adjusting exposure, white balance, and contrast, while Photoshop is ideal for detailed retouching and advanced edits, such as removing unwanted objects or correcting distortions. For photographers who prefer simpler tools, programs like Luminar AI or Capture One also offer powerful editing options with user-friendly interfaces.
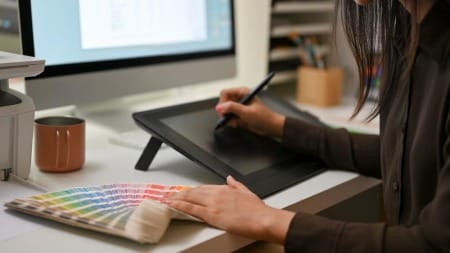
Using high-quality software not only ensures your images look polished but also helps maintain consistency across a set of photos, which is particularly important for professional presentations or portfolios.
5.2 Correcting Exposure and Color Balance
Exposure and color balance are two key aspects that can make or break your interior photography. Rooms often have varying light sources, which can result in uneven brightness and color casts. Start by adjusting the exposure to ensure no areas are overly bright or too dark. If you’ve shot in RAW format, you’ll have more flexibility in recovering details from highlights and shadows.
Color balance is equally important. Mixed lighting can create unnatural color tones, making the space look unappealing. Use the white balance slider in your editing software to achieve a natural and cohesive color tone. You can also use targeted adjustments to correct specific areas, ensuring that both warm and cool tones harmonize throughout the image.
5.3 Retouching Details for a Polished Look
To elevate your interior photography, pay attention to the small details during post-processing. Start by removing any distracting elements, such as power outlets, wires, or reflections that may detract from the overall composition. Photoshop’s clone stamp and healing brush tools are particularly useful for this purpose.
Next, enhance textures and details to bring the space to life. Subtle sharpening can help emphasize architectural features and fabric patterns, while contrast adjustments add depth and dimension to the scene. If necessary, use selective editing tools to highlight focal points, such as a striking piece of furniture or a unique design feature.
Finally, consider using techniques like HDR blending or focus stacking to achieve a more professional finish. HDR blending combines multiple exposures to balance highlights and shadows, while focus stacking ensures sharpness across the entire frame.
By mastering these post-processing techniques, you can transform raw images into stunning works of art that fully capture the beauty and functionality of interior spaces. Post-processing is an essential skill for any photographer looking to excel in the competitive field of interior photography.
6. Pro Tips for Perfect Interior Shots
6.1 Working with Angles to Capture Spaciousness
In interior photography, angles play a critical role in how a space is perceived. Choosing the right angle can make a room feel open, inviting, and well-balanced. For smaller rooms, shooting from a lower height and using a wide-angle lens can create the illusion of greater space. Position yourself in a corner to capture as much of the room as possible while maintaining perspective accuracy.
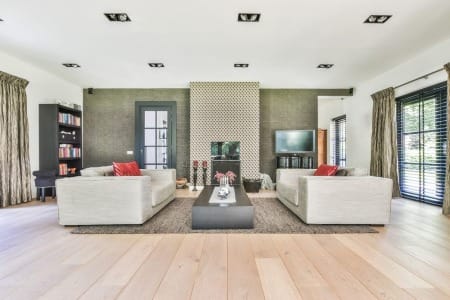
Experimenting with various angles can also highlight different elements of the interior. A straight-on shot is ideal for symmetrical spaces, such as a centered fireplace or a perfectly aligned dining table. Meanwhile, shooting at a slight diagonal can create depth and dynamism, drawing the viewer’s eye through the frame.
6.2 Highlighting Key Features of the Interior
Every space has unique features that make it special, and these should be the focal points of your interior photography. Whether it’s a stunning chandelier, intricate woodwork, or a cozy reading nook, make sure to emphasize these elements in your shots.
To do this, use selective focus to isolate the feature and blur the surrounding area slightly. Alternatively, frame the feature using elements within the room, such as doors, windows, or furniture, to draw attention to it. Lighting also plays a significant role in showcasing these details. Use natural or artificial light to highlight textures, colors, and shapes that make the feature stand out.
6.3 Avoiding Common Mistakes in Interior Photography
Even skilled photographers can make mistakes when shooting interiors. One common error is failing to declutter the space before shooting. Clutter, such as cords, papers, or misplaced objects, can detract from the overall aesthetic. Always take a few moments to tidy the area and style it appropriately before starting your session.
Another frequent issue is uneven lighting. Harsh shadows or blown-out highlights can make a photo look unprofessional. Use diffusers, reflectors, or multiple light sources to achieve balanced illumination throughout the room.
Perspective distortion is another pitfall in interior photography, often caused by tilting the camera upward or downward. This can make walls or furniture appear skewed. To avoid this, ensure your camera is level with the room and use a tripod for precision.
By paying close attention to angles, emphasizing key features, and avoiding common mistakes, you can significantly elevate the quality of your interior photography. These pro tips help ensure your images capture the true beauty and character of every space, making them both visually stunning and professionally polished.
7. Conclusion
7.1 Recap of Top Techniques for Perfect Shots
Interior photography is an art that combines technical expertise and creative vision to showcase spaces in their best light. By understanding the basics, you can establish a strong foundation that helps you tackle common challenges like lighting and composition. Mastering lighting techniques, such as balancing natural and artificial light, ensures that every corner of the room is beautifully illuminated. Similarly, applying effective composition strategies, like using the rule of thirds and creating depth, enhances the visual appeal of your images.
Choosing the right gear, including wide-angle lenses and sturdy tripods, is essential for capturing sharp, professional-quality photos. Post-processing further refines your work, enabling you to correct exposure, adjust color balance, and polish details for a flawless final image. Pro tips, such as working with angles and highlighting key features, bring out the personality of each space, ensuring your photos stand out.
7.2 Encouragement to Experiment and Develop Your Style
Interior photography is a rewarding journey that grows with practice and exploration. Don’t hesitate to experiment with new techniques, angles, and lighting setups to find your unique style. With dedication and attention to detail, you’ll be able to create stunning visuals that not only capture interiors but also tell their story in an inspiring way.
Thank you for visiting our site and being part of this journey with us! We rely on the generous support of visitors like you to continue providing high-quality. Your donation, no matter the size, helps us maintain the website and create more valuable resources for everyone.

