10 Effective Techniques to Improve Photo Resolution: A Guide for Photographers
Introduction
In today’s digital age, achieving high-quality images is essential, especially for photographers and content creators who want to make an impact. Understanding how to improve photo resolution can be the difference between a good image and a stunning one. Resolution plays a vital role in determining the level of detail, clarity, and sharpness that a photo displays, which can be especially important when photos are intended for large prints or high-resolution digital screens.
Many factors can affect photo resolution, from the initial capture settings to the tools used in post-processing. Fortunately, there are various techniques available for those wondering how to improve photo resolution, including both software-based solutions and camera-specific settings. This guide will walk you through a range of methods, from using advanced AI-powered upscaling software to optimizing your RAW workflow and leveraging built-in high-resolution modes on certain cameras. Whether you're a professional photographer or simply looking to enhance your images, these techniques offer practical and effective ways to improve image quality and achieve crisp, high-resolution results.
Affiliate Disclaimer
This blog post may include links to affiliate sites. If you click on an affiliate link and make a purchase, we may earn a small commission or receive other compensation at no extra cost to you. Please note that many of the links on our site are affiliate links. Our use of these links does not impact the products, services, or websites we recommend to you. This disclaimer covers all forms of communication with you, including our website, email, phone, social media, products, and other platforms.
Chapter 1: Super-Resolution AI Software
Overview of Super-Resolution AI Technology
When it comes to learning how to improve photo resolution, one of the most effective modern solutions is Super-Resolution AI software. This technology leverages machine learning algorithms to analyze, enhance, and upscale images by adding realistic details and textures, making low-resolution images appear crisp and high-quality. Unlike traditional upscaling methods, which often result in pixelation or loss of quality, AI-driven super-resolution software intelligently predicts and reconstructs fine details, filling in missing information for a more natural look.
Popular Super-Resolution AI Software Tools
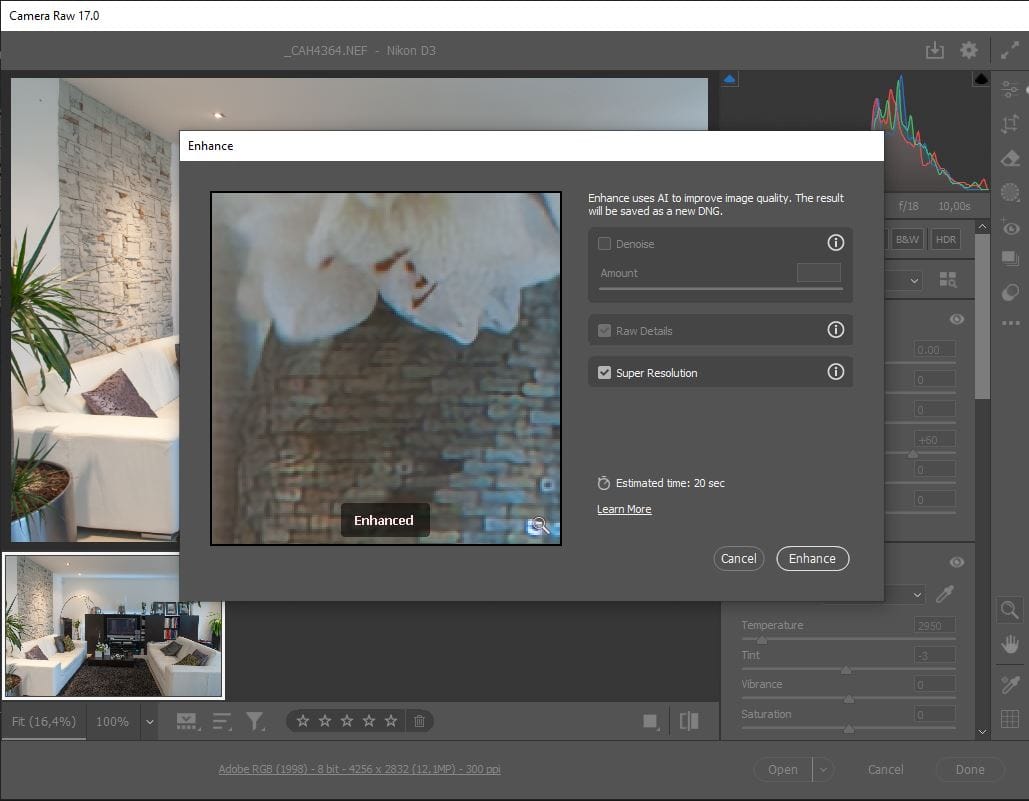
There are several industry-leading tools available for photographers and creators seeking to enhance image quality. Popular software like Topaz Gigapixel AI and Adobe Super Resolution (within Adobe Camera Raw) have become go-to options. These applications offer user-friendly interfaces, along with advanced settings that allow users to customize the level of detail and sharpness in their images. Topaz Gigapixel AI, for example, uses deep learning to enlarge photos up to six times their original resolution while maintaining impressive detail and reducing noise.
Benefits and Limitations of Super-Resolution AI
Using AI-powered tools is one of the most effective answers to the question of how to improve photo resolution, especially when dealing with older images or smaller files. The primary advantage is the level of detail and minimal artifacts, even when significantly enlarging an image. However, these programs do require powerful hardware and often come with a cost. For photographers who prioritize detail and need professional-level resolution improvements, AI super-resolution software can be an invaluable resource.
Chapter 2: Editing in Adobe Photoshop
Using Photoshop for Image Upscaling
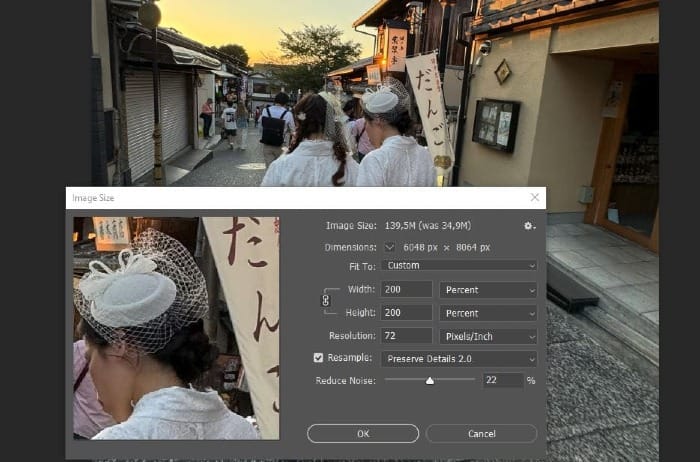
Adobe Photoshop offers several powerful tools for those seeking ways to improve photo resolution. Within Photoshop, one of the most effective methods is using the "Image Size" dialog with the "Preserve Details 2.0" resampling option. This approach allows users to upscale images while maintaining as much quality as possible. Unlike basic resizing, the "Preserve Details 2.0" algorithm minimizes the loss of sharpness and detail, providing a high-quality enlargement that’s suitable for various applications, from web use to professional prints.
Step-by-Step: How to Use 'Preserve Details 2.0' in Photoshop
To upscale an image in Photoshop, open your photo and navigate to the "Image Size" option under the Image menu. In the dialog box, set your new dimensions and select "Preserve Details 2.0" from the dropdown list of resampling methods. Adjust the "Reduce Noise" slider to fine-tune the result based on the image’s original quality. This feature enables users to achieve a balance between sharpness and noise control, which is key when learning how to improve photo resolution effectively.
Benefits and Limitations of Photoshop’s Upscaling Tools
Photoshop’s upscaling tools are well-suited for making moderate resolution improvements, particularly in cases where only a slight enhancement is needed. It’s a great choice for images intended for social media, website use, or even small print projects. However, Photoshop’s upscaling is limited in how much resolution can be gained without introducing noticeable artifacts or blurriness, especially if the image needs significant enlargement. Nonetheless, for users already familiar with Photoshop, this option provides a straightforward and powerful method to enhance resolution within a familiar interface.
Chapter 3: Vector Tracing for Scalability
Understanding Vector Tracing and Scalability
One unique method for those exploring how to improve photo resolution is vector tracing, a technique that converts raster images (made of pixels) into vector graphics (made of paths). Unlike traditional photos that are pixel-based, vector graphics are composed of mathematical equations that allow the image to be scaled up or down infinitely without any loss of quality. This makes vector tracing an ideal solution for images that need to be displayed at various sizes without risking pixelation or blurry edges.
How to Use Vector Tracing Software
Vector tracing can be done in several software programs, with Adobe Illustrator and CorelDRAW being two popular choices for this purpose. To convert an image, users can employ the "Image Trace" feature in Illustrator, which automatically traces the outlines, colors, and shapes in a photo to generate a vector version. This vector image can then be resized without quality loss. However, vector tracing works best with simpler images that have defined edges and solid colors—logos, icons, and illustrations are ideal candidates. For more complex or photorealistic images, this approach may not yield desirable results.
Pros and Cons of Vector Tracing
Vector tracing is a powerful solution for how to improve photo resolution in certain types of images, providing infinite scalability without any degradation in quality. However, it is limited in application. This method is generally not suitable for high-detail, photorealistic images, as the vectorization process simplifies details. Instead, vector tracing shines in projects that require high scalability for graphic elements, like logos and line art, where clarity and sharpness are prioritized over photorealism.
Chapter 4: Camera RAW Workflow Optimization
What is Camera RAW Workflow Optimization?
For photographers seeking effective ways on how to improve photo resolution, optimizing the RAW workflow is one of the most impactful techniques. Shooting in RAW captures all the data that the camera sensor records, unlike JPEG, which compresses the image and discards some data to reduce file size. A RAW file contains a wealth of detail, allowing for extensive post-processing without losing quality. This added flexibility means you can extract maximum sharpness, color depth, and detail, which can contribute significantly to enhancing the image’s resolution appearance.

Steps to Optimize RAW Workflow for Enhanced Resolution
To get started with a RAW workflow, use software like Adobe Lightroom or Capture One, which are designed to handle RAW files and provide precise editing controls. Begin by adjusting sharpness, clarity, and noise reduction settings to bring out as much detail as possible. Carefully use sharpening to enhance edges without creating artifacts, and apply noise reduction to remove graininess, especially in high ISO images. These adjustments, when done correctly, bring out finer details that can improve the perceived resolution of an image. Finally, consider exporting the image at a higher resolution or upscaling it with a tool like Adobe Super Resolution, especially if larger prints are the goal.

Advantages and Drawbacks of RAW Workflow Optimization
Using a RAW workflow as part of how to improve photo resolution allows photographers to retain every detail captured, enabling superior post-processing flexibility. The main drawback is that RAW files are significantly larger than JPEGs and require specialized software and more processing time. However, for professional work, landscapes, and portraits where detail is paramount, optimizing your RAW workflow is invaluable. It allows photographers to make the most of their original image quality, ensuring that each photo reaches its full resolution potential.
Chapter 5: Multi-Frame Stacking for Enhanced Detail
What is Multi-Frame Stacking?
Multi-frame stacking is an advanced technique that leverages multiple shots of the same scene to increase resolution, reduce noise, and bring out fine details. For photographers exploring how to improve photo resolution, this method is particularly effective for stationary subjects or low-light scenes where noise reduction and detail enhancement are critical. By capturing multiple images and combining them, this technique averages out inconsistencies and enhances details, ultimately creating an image that appears sharper and more detailed than a single shot could achieve.
How to Use Multi-Frame Stacking for Higher Resolution
To perform multi-frame stacking, you’ll need a camera capable of taking multiple shots in quick succession, as well as editing software like Adobe Photoshop or specialized stacking programs such as Helicon Focus. Start by setting your camera on a tripod to ensure each frame aligns perfectly. Capture multiple shots of the scene, typically between five to ten images, with consistent exposure and focus settings. In post-processing, load these images into your stacking software, where they can be aligned and merged. By averaging out the frames, the software can reduce noise and enhance detail in the final image, effectively making it appear higher in resolution.
Benefits and Limitations of Multi-Frame Stacking
For photographers interested in how to improve photo resolution, multi-frame stacking offers substantial advantages, particularly in fields like landscape, macro, and astrophotography. It allows for noise reduction and detail enhancement without artificial upscaling, giving the final image a natural, high-resolution look. However, it’s not ideal for scenes with movement or for handheld shooting, as any motion can result in alignment issues. Although this method requires careful setup and post-processing, the results are often impressive, making it a valuable tool for anyone looking to maximize image clarity and resolution in challenging conditions.
Chapter 6: Using Image Upscaling Plugins
What are Image Upscaling Plugins?
Image upscaling plugins are specialized tools designed to enhance and enlarge images, seamlessly integrating with popular photo editing software like Adobe Photoshop. For photographers exploring how to improve photo resolution, these plugins offer advanced algorithms that go beyond basic resizing, using interpolation and detail-enhancement techniques to increase image dimensions while preserving as much quality as possible. These plugins are particularly useful for professionals who need efficient, high-quality enlargements without sacrificing detail or introducing pixelation.
How to Use Upscaling Plugins for Resolution Improvement
To get started with an upscaling plugin, install it within your photo editing software of choice, such as Photoshop. Popular options include Blow Up by Alien Skin and ON1 Resize. Once installed, you can access these plugins through the software’s filter or plugin menu. Begin by selecting the image you wish to upscale, and open the plugin to adjust settings like enlargement size, sharpening level, and grain control. These plugins often allow users to specify exact dimensions or percentages for upscaling and provide real-time previews so you can see how the adjustments affect image quality before finalizing. Many of these plugins also include options for maintaining texture and detail, which is essential for preserving a natural look in larger images.
Advantages and Drawbacks of Using Upscaling Plugins
Using upscaling plugins is an effective way for photographers to learn how to improve photo resolution without needing to master advanced editing techniques. These tools are generally easy to use, integrate well with existing workflows, and can handle a range of upscaling tasks, from web images to print enlargements. However, some plugins may require a subscription or additional cost, and while they are effective, they may not match the quality of AI-powered super-resolution tools. For photographers needing high-quality results quickly, though, upscaling plugins offer a reliable, efficient solution that balances convenience and quality, making them a valuable addition to any photographer’s toolkit.
Chapter 7: Online Upscaling Tools for Convenience
What are Online Upscaling Tools?
Online upscaling tools provide a convenient, web-based solution for anyone looking to enhance their photos without downloading or installing dedicated software. For those interested in how to improve photo resolution, these tools offer a quick and accessible way to upscale images using AI-driven algorithms. Many online upscalers employ advanced techniques similar to those in professional software, enhancing details and minimizing pixelation. This makes them ideal for one-off tasks, casual users, or photographers who need fast results without complex editing software.
How to Use Online Upscaling Tools for Resolution Enhancement
To use an online upscaling tool, simply upload your image to a platform such as Let’s Enhance, Waifu2x, or BigJPG. These platforms typically offer free and paid tiers, with the latter providing higher resolution limits and more customization options. Once your image is uploaded, you can select the desired output size—often up to 4x or more—and choose any additional settings, like noise reduction or sharpening. Many of these tools also offer real-time previews, allowing you to see the effect of the upscaling before downloading the final image. After processing, the enhanced image can be downloaded directly, making it easy to get high-quality results without any software installation.
Advantages and Limitations of Online Upscaling Tools
Online upscaling tools are highly beneficial for users learning how to improve photo resolution without investing in expensive software or a steep learning curve. They provide convenience and are ideal for quick enhancements, especially when access to professional tools is limited. However, quality can vary, especially on free platforms, and reliance on an internet connection may slow down the process or limit accessibility for large files. Additionally, while these tools are effective, they may not match the quality of desktop applications or professional AI tools for larger prints. Nevertheless, online upscalers are a practical choice for improving resolution on a budget, especially for images meant for digital use or smaller prints.
Chapter 8: High-Resolution Mode on Cameras
Understanding High-Resolution Mode on Cameras
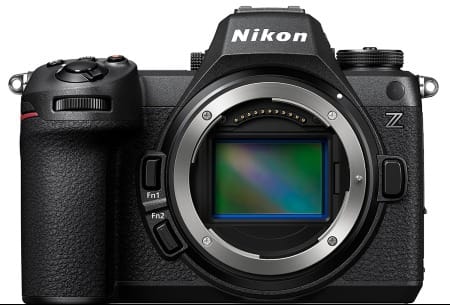
For photographers looking into how to improve photo resolution directly from the camera, high-resolution mode is an exceptional feature available on select models. This mode, found in cameras from brands like Olympus, Panasonic, and Nikon, captures multiple images in rapid succession, then combines them in-camera to produce a single, high-resolution image. This technique leverages sensor-shifting technology to capture additional detail and increase the overall resolution without interpolation or artificial upscaling, making it ideal for photographers seeking the highest possible quality directly from their equipment.
How to Use High-Resolution Mode for Enhanced Resolution
To use high-resolution mode, start by enabling it within your camera’s settings. It’s crucial to mount the camera on a stable tripod to eliminate any movement, as this feature relies on precise alignment across multiple shots. The camera will then take several frames, each slightly shifting the sensor by a fraction of a pixel, capturing additional detail with each shift. Once the shots are captured, the camera combines them into a single, higher-resolution image. The result is an image that exceeds the camera’s native resolution, making it appear richer in detail and clarity. This technique is particularly useful for stationary subjects like landscapes, architecture, and studio shots, where maximum detail is desired.
Benefits and Limitations of High-Resolution Mode
High-resolution mode is an excellent option for photographers wondering how to improve photo resolution without relying on post-processing software. By capturing and merging data directly in-camera, it produces high-quality images with enhanced detail and sharpness. However, it has limitations: any subject movement can create artifacts or ghosting, making it unsuitable for action or wildlife photography. Additionally, not all cameras offer this feature, and it is often limited to higher-end models. Despite these constraints, high-resolution mode is invaluable for capturing stationary scenes in stunning detail, offering photographers a straightforward method to achieve greater resolution and quality straight out of the camera.
Chapter 9: Capture Higher Resolution Directly
Importance of Capturing Images at Higher Native Resolution
When exploring how to improve photo resolution, one of the most straightforward and effective methods is to capture images at the highest possible resolution directly from the camera. This approach ensures that every photo starts with the maximum amount of detail, clarity, and flexibility for post-processing, especially important for projects that require high-quality enlargements. Choosing a camera with a high native resolution, such as full-frame or medium-format models, provides a solid foundation for image quality that can handle cropping, scaling, and extensive edits without significant degradation.
Choosing the Right Equipment for Higher Resolution
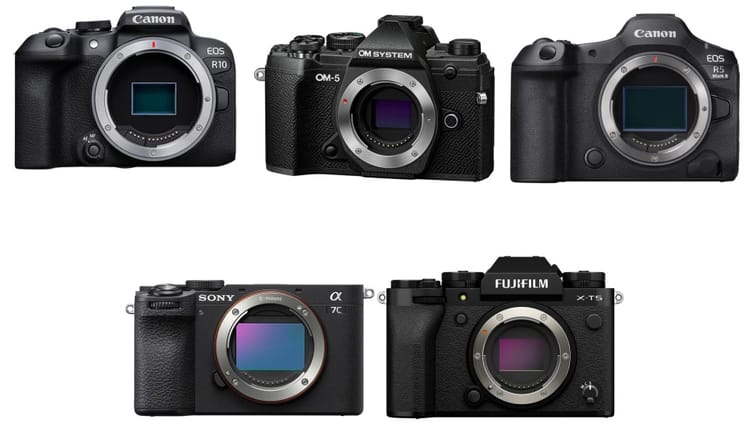
To maximize resolution, consider using cameras with sensors that offer high megapixel counts. Cameras like the Sony A7R series, Canon EOS R5, and Nikon Z7 feature sensors designed for high-resolution photography, often in the range of 40-60 megapixels or more. These sensors capture exceptionally detailed images, making them ideal for large prints or high-detail projects. Additionally, pairing these cameras with high-quality lenses ensures that the detail captured by the sensor is sharp and clear across the frame. Many cameras also offer the option to shoot in RAW format, which preserves all data captured by the sensor and allows for better post-processing flexibility, contributing to an even higher perceived resolution.

Benefits and Drawbacks of High-Resolution Capture
For those focused on how to improve photo resolution, capturing images at a higher native resolution is often the best approach. This method reduces reliance on software-based upscaling, producing naturally detailed images ready for professional use. However, high-resolution files are typically large, requiring more storage space and processing power, both on the camera and in post-production. Additionally, high-resolution cameras are generally more expensive, which may not be ideal for all budgets. Despite these considerations, capturing high-resolution images directly from the camera provides a foundational quality that is hard to achieve through post-processing alone, making it an essential strategy for professionals who prioritize image detail and quality.
Chapter 10: Denoising and Sharpening Filters for Clarity
Using Denoising and Sharpening Filters to Enhance Image Resolution
For photographers exploring how to improve photo resolution, denoising and sharpening filters are valuable tools that can significantly enhance image clarity and perceived resolution. While these filters don’t increase pixel count, they improve the visibility of details by reducing noise and enhancing edges, which can make an image appear sharper and more defined. This is especially beneficial for images taken in low-light conditions or at high ISO settings, where noise can obscure finer details. Applying these filters can give an image a polished look, perfect for both digital display and print.
How to Apply Denoising and Sharpening Filters Effectively
To make the most of these filters, use software like Adobe Lightroom, Photoshop, or specialized tools such as DXO PureRAW, which offer advanced noise reduction and sharpening options. Start by applying a denoising filter to minimize graininess, particularly in areas with flat colors, like skies or backgrounds, where noise can be most noticeable. Be careful to find a balance, as excessive denoising can blur details. Once noise reduction is applied, use a sharpening filter to enhance edges and bring out texture in subjects, making them appear crisper and clearer. These filters work together to reveal details otherwise hidden by noise, enhancing the overall resolution feel of the photo.
Benefits and Limitations of Denoising and Sharpening
Denoising and sharpening filters are key components for those learning how to improve photo resolution without significantly altering the original file. They are simple to apply and can produce impressive results, especially for older images or those shot in challenging lighting. However, these techniques have limitations: too much denoising can soften details, and oversharpening can create unwanted artifacts or halos around edges. While denoising and sharpening won’t technically increase resolution, they do improve the appearance of detail, making these filters a powerful option for photographers aiming to maximize clarity and quality in their final images.
Conclusion
Improving photo resolution is essential for photographers and content creators looking to produce high-quality, professional images that capture attention. As we've explored, there are numerous approaches to mastering how to improve photo resolution, each suited to different types of projects and skill levels. From sophisticated software solutions like Super-Resolution AI and multi-frame stacking to straightforward methods such as using high-resolution cameras and optimizing RAW workflows, every technique offers unique benefits and challenges.
Understanding how to improve photo resolution involves selecting the right tools based on the intended output, whether it’s for digital display, social media, or large-format prints. For instance, AI-powered tools and dedicated upscaling plugins provide powerful options for enhancing detail, while denoising and sharpening filters offer a quick way to boost clarity in lower-resolution images. Camera-based options, such as high-resolution mode and high-megapixel sensors, allow photographers to capture maximum detail from the start, minimizing the need for post-processing.
Experimenting with these methods can help photographers identify the best techniques to suit their style and equipment, enabling them to achieve optimal resolution without compromising quality. Whether you’re a beginner looking for simple tools or a professional in need of advanced solutions, mastering these techniques will give you greater control over your image quality, ensuring every photo looks its best across various platforms and media.
Thank you for visiting our site and being part of this journey with us! We rely on the generous support of visitors like you to continue providing high-quality. Your donation, no matter the size, helps us maintain the website and create more valuable resources for everyone.

