Lightroom Presets

Lightroom presets are predefined settings or filters that help streamline the photo editing process in Adobe Lightroom. They save a series of adjustments (such as exposure, contrast, color balance, etc.) and can be applied to any photo with one click. Presets are an essential tool for both beginners and professionals, as they allow you to quickly apply a consistent look or mood to a series of images, making them especially useful for photographers, social media influencers, and content creators.
Lightroom Mobile Presets
Lightroom Mobile is a powerful, cloud-based version of Lightroom that is designed for editing on the go. Mobile presets are highly popular among users due to the convenience of editing photos directly on a smartphone or tablet. With Lightroom Mobile, you can:
- Apply presets to images quickly and easily.
- Sync presets across devices if you’re using Lightroom’s Creative Cloud.
- Create custom presets tailored to your specific needs or style.
Lightroom Mobile Presets have become a trend among Instagram influencers, photographers, and bloggers, allowing them to develop a cohesive aesthetic across their photos.
Advantages of Lightroom Mobile Presets:
- Portability: Edit anywhere, anytime from your mobile device.
- Ease of use: User-friendly interface with one-tap preset application.
- Great for social media: Presets allow for a consistent look across all images, which is important for branding.
Lightroom Classic Presets
Lightroom Classic is the desktop version of Adobe Lightroom, offering more advanced features and a more robust workflow for professional photographers. Classic presets work similarly to mobile presets but are often used in a more comprehensive editing environment with additional controls for fine-tuning.
With Lightroom Classic, you can:
- Apply presets to large batches of photos at once (perfect for wedding photographers or anyone with high-volume editing needs).
- Use more advanced editing tools, such as tone curves, HSL adjustments, and more detailed color grading.
- Customize presets more deeply due to the software’s powerful editing features.
Advantages of Lightroom Classic Presets:
- Bulk editing: Apply presets to hundreds of photos simultaneously.
- Advanced editing capabilities: Fine-tune your presets to create more unique looks.
- Detailed adjustments: You have more control over specific elements such as colors, lighting, and sharpening.
Differences Between Mobile and Classic Presets
While the core function of presets is the same in both versions, Lightroom Classic presets often contain more advanced adjustments due to the additional tools available on the desktop. However, Lightroom Mobile offers a streamlined editing experience, making it perfect for quick edits and on-the-go work.
- Accessibility: Lightroom Mobile is ideal for editing when you’re away from your desktop, while Classic is suited for more detailed work.
- Customization: Lightroom Classic allows for more in-depth customization of presets, whereas Mobile focuses on ease of use.
- Synchronization: If you use Lightroom’s Creative Cloud, your presets can sync between mobile and desktop, meaning you can create or import presets on one platform and use them on the other.
How to install Lightroom Classic Presets
This is a short workflow description of how to install Presets for Lightroom Classic V 7.3 and Later.
Using Lightroom presets is an easy way to edit and retouch images in Adobe Lightroom. It is an easy way because, in some cases, you are ready just by one click. In more typical situations, using preset is a good start, and you only need to make a subtle fine-tuning afterward.
The reason is simple: each preset is produced based on a particular original photo. So whenever you use the preset on your image, it won’t be the same, so you will need to make further adjustments.
Presets are extremely helpful, and there is always a good reason to use them.
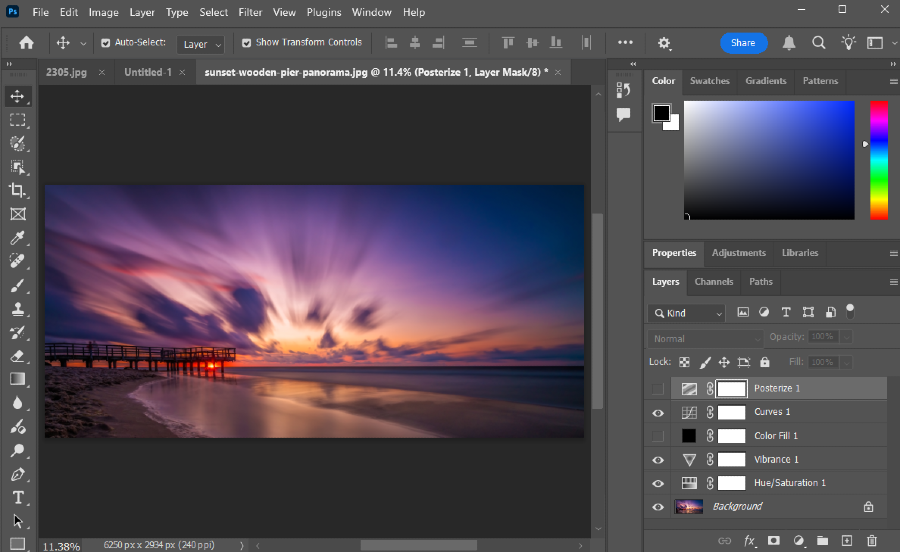
I use presets on complicated images; then, I make adjustments in Lightroom and, if needed, follow up with the final touches in Photoshop.
How to install Lightroom Classic Presets
1. After downloading the preset or preset pack, locate it in your Download folder – a ZIP file.
2. Unzip the file to your destination folder – extract all files from the ZIP file.
3. Open Lightroom Classic on your PC or Mac.
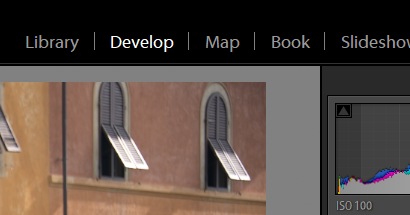
4. Navigate and click the Develop Module button – it is located on the top right of the screen
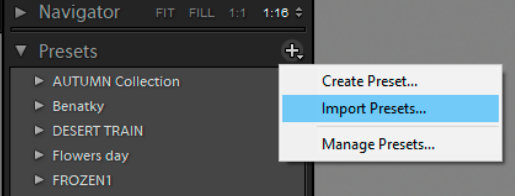
5. Now move the mouse to the left part of the screen and locate the drop-down bar named Presets.
6. Click on “+” icon and select “Import presets” option
7. Locate an unzipped file or folder on your disk.
8. Select all XMP files. Each XMP file represents a different preset, so click the Import button.
9. You will now see new preset (presets) in the Preset drop-down bar.
follow
How to install Lightroom Mobile Presets
Download, unzip & transfer to the mobile device
First of all, you need to transfer your presets to your mobile device. the best way is to unpack your downloaded file on a PC and then to transfer it into your mobile device.
- Locate the Preset Pack ZIP file in your Downloads folder.
- Unzip the Preset Pack ZIP file. (Windows: Right-click the ZIP file, and select Extract All….)
- Choose where you want the preset folder to be created and click the Extract button.
- Mac: Double-click the ZIP file. The DNG files will automatically be placed inside a new folder.
HOW TO TRANSFER PRESETS (DNG FILES) TO MOBILE DEVICE
Now that the presets are unzipped, you’ll need to transfer the DNG files to your mobile device.
- This could be your cloud storage, where you have unzipped all downloaded DNG files–presets. For Example it could be the Dropbox.
- Another method that will work across most devices is email. Simply Attach the DNG files to an e-mail and send it to yourself. Open the e-mail on your mobile device and then download the attached files.
- Once the DNG files are on your mobile device, make sure you have the Adobe Lightroom app installed and updated to the latest version.
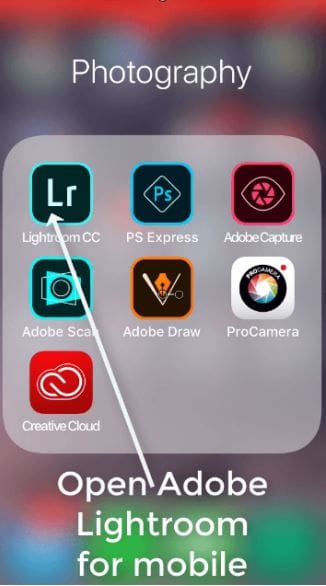
Tap the Lr icon on your mobile phone after you installed the Light[1]room mobile CC. This operation requires an Adobe ID, so first you have to register on Adobe.
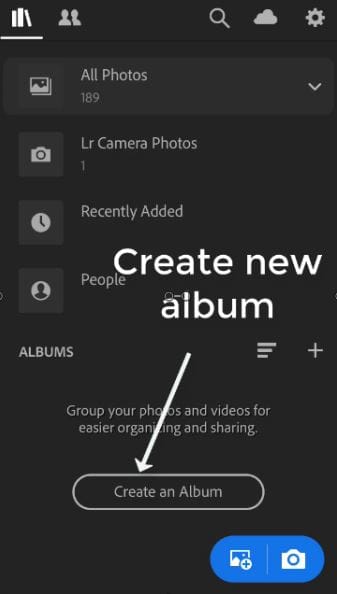
- Create a new album
You can create a new album by tapping the "Create an Album" - in case you haven't created one yet. Or tap the + sign and create a new album this way. Best option is to give the album the same name as the Preset Pack
- Tap on the newly created Album to open it. It’s currently empty, but we’re going to fill it with the DNG images you downloaded.
- Tap on the icon in the bottom right corner, then select the directory where you saved the DNG files.
- Select all of the DNG files and tap Add. The DNG files will load within the Album. Each DNG image has a different preset applied to it, which you can save to use on other images in Lightroom.
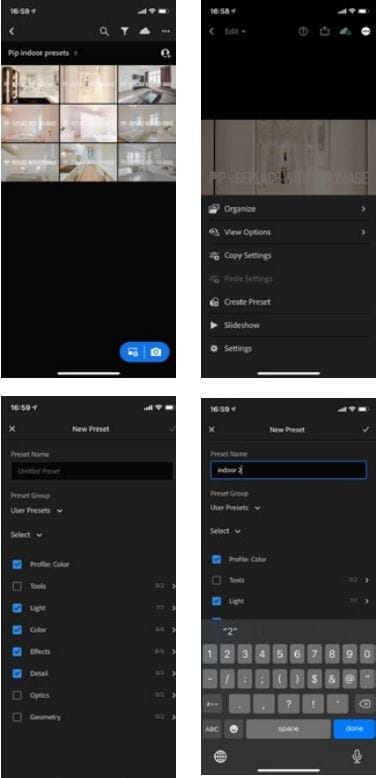
- Open the first DNG image and tap on the (...) icon in thew top right corner. Select Create Preset. The Create Preset menu will open. The default settings are ok but make sure that Profile: Color, Light, Color, Effects, and Detail are all checked.
- Tap on Preset Group, and select Create New Preset Group. We recommend naming the group after the preset pack you downloaded. Check Mark icon in the top right corner.
- Back at the New Preset menu, give the preset a name. After naming the preset, tap the Check Mark icon in the top right corner. The first preset has been saved!
- Repeat this process for each of the other DNG images.
How to use your new presets

- Tap on the image you want to apply a preset to.
- Locate the toolbar at the bottom of the screen. Scroll to the right until you see the Presets option. Tap on Presets.
- Select the Preset Group, then select the preset you want to apply.
- If you want to see a before and after to compare, just tap and hold your finger on the image to see the original and release it to see it with the preset coloring applied.
- You’re done! Now go and have some fun with your new set of Lightroom Presets.
Conclusion
Whether you’re using Lightroom Mobile or Classic, presets can drastically speed up your workflow and give your images a consistent and professional appearance. Mobile presets are perfect for on-the-go editing and social media consistency, while Lightroom Classic presets offer deeper customization for professional and batch editing tasks.
Incorporating presets into your workflow can help you develop your unique style and save time on editing, allowing you to focus more on creativity and less on the technical side of things.